Master Your Product Photography Lighting Setup
Elevate your e-commerce photos with our guide to the perfect product photography lighting setup. Learn pro techniques for stunning, sales-driving images.
A killer product photography lighting setup is what separates an item that flies off the virtual shelf from one that just sits there. Forget the camera, the lens, or the backdrop for a second. How you shape and control light is what truly dictates the quality, professionalism, and trustworthiness of your images.
Honestly, it's the single most important tool in your entire kit.
Why Lighting Is Your Most Important Tool
Ever taken a photo that looked flat, had a weird yellow tint, or was ruined by harsh, ugly shadows? That’s a lighting problem. It’s easy to blame the camera, but the reality is that even the most expensive gear can't salvage a poorly lit scene. A well-thought-out lighting setup puts you in the driver's seat, giving you complete control over how customers see your product.
That control is what elevates a simple snapshot into professional e-commerce photography that actually drives sales. It lets you:
- Reveal True Colors and Textures: Good lighting makes sure the vibrant red of a handbag or the delicate texture of handmade soap looks just as good online as it does in person. This drastically cuts down on returns from disappointed customers.
- Create Dimension and Depth: By playing with shadows, you can make a flat object feel three-dimensional. It gives it shape and presence that grabs a viewer's attention.
- Eliminate Distractions: The right setup helps you manage annoying reflections on glossy surfaces and kill unwanted shadows, keeping the focus squarely on your product.
- Build Trust and Professionalism: Clean, consistent, and beautifully lit photos send a powerful message: your brand is the real deal. This visual polish is a cornerstone of effective content creation for ecommerce.
Understanding Hard vs. Soft Light
At its core, lighting quality really comes down to one concept: hard light versus soft light.
Hard light, like what you get from the direct sun at noon, creates sharp, defined shadows and high contrast. It can be dramatic, but it's often way too harsh for product photos, hiding important details in those deep, dark shadows.
Soft light, on the other hand, is what you get on an overcast day or from a big softbox. It wraps around your product, creating gentle, feathered shadows and smooth transitions from light to dark. For 90% of product photography, soft light is what you're aiming for. It’s flattering and shows off every detail perfectly.
The goal isn't just to make a product visible; it's to make it desirable. Mastering your product photography lighting setup is the fastest way to elevate your brand's perceived value and build a connection with your customer before they even read the description.
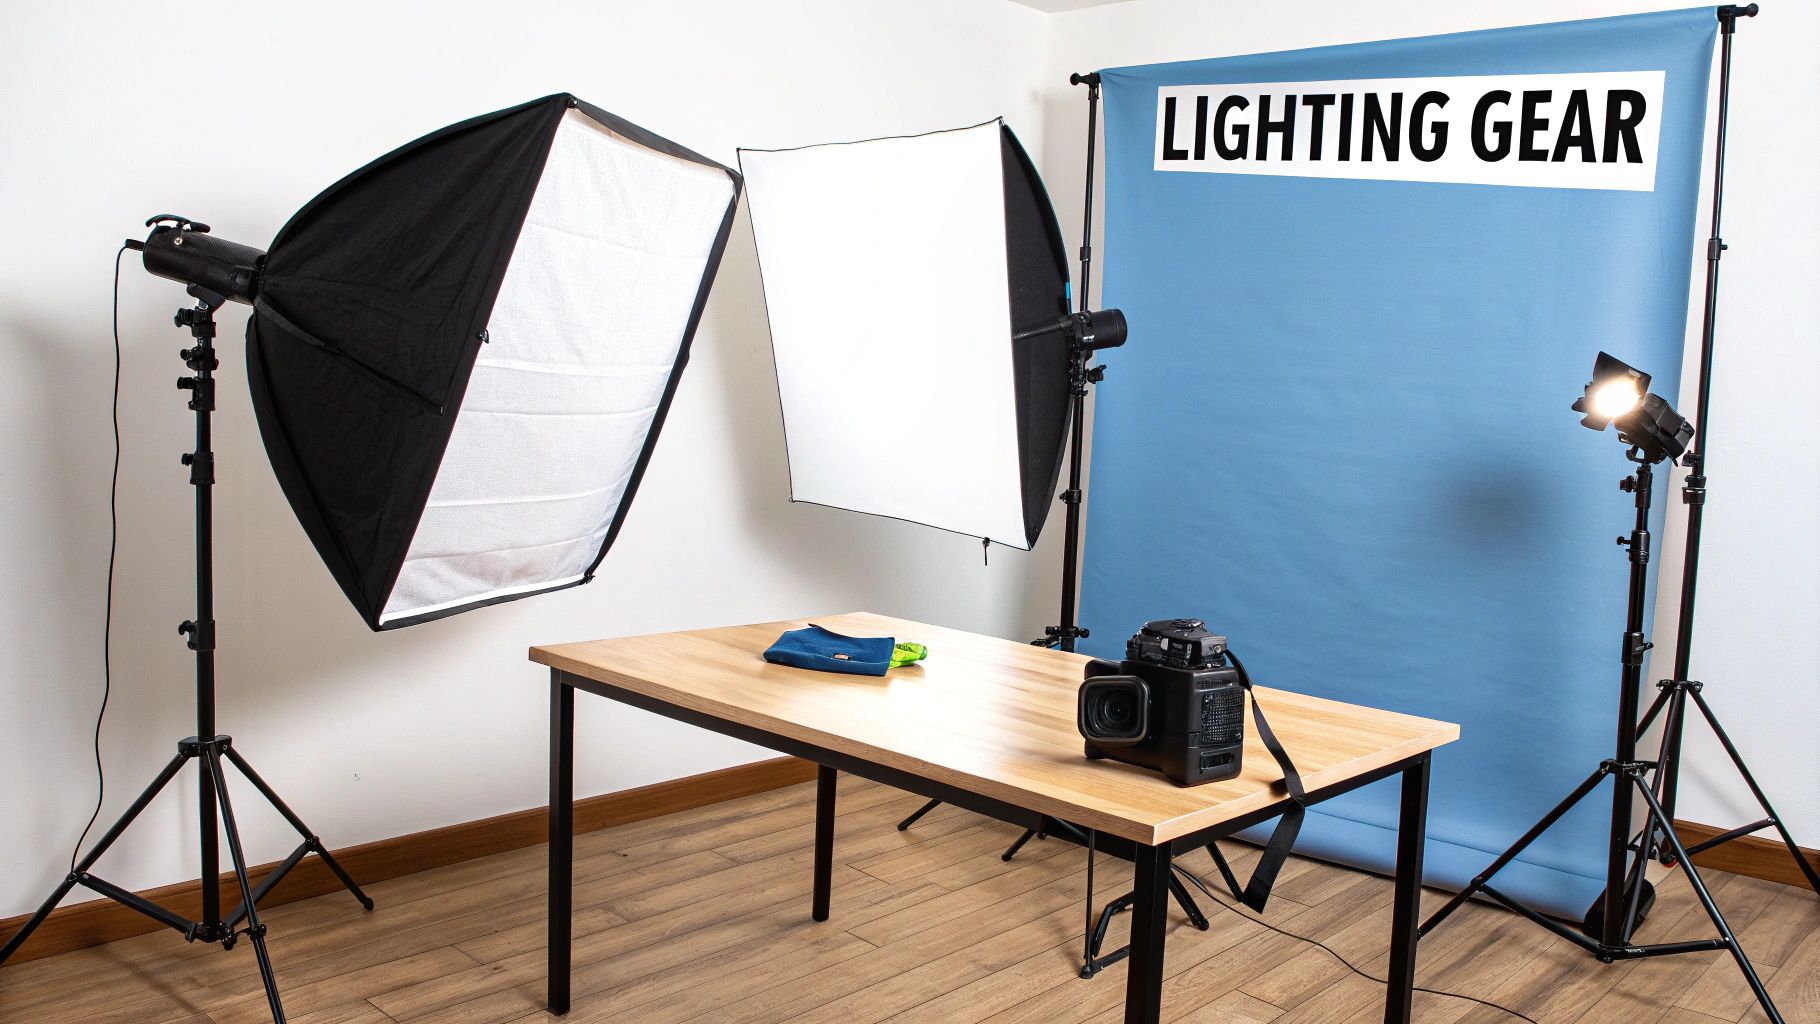
Your Core Lighting Toolkit
Getting started doesn't mean you need a Hollywood-sized budget. The explosion of e-commerce has made professional-grade gear more accessible than ever. In fact, the global photography lighting equipment market was valued at around $5.15 billion in 2024 and is only expected to grow, all thanks to the needs of online sellers and content creators like us.
Here’s a quick rundown of the essential tools you’ll want in your corner to build a versatile and effective setup.
To get started, you really only need a handful of key pieces. This table breaks down the essentials and what they do for you.
Core Components of a Professional Lighting Setup
| Component | Primary Function | Impact on Photo | | :--- | :--- | :--- | | Key Light | The main and brightest light source in your setup. | Establishes the overall exposure and creates the main highlights and shadows, defining the product's form. | | Fill Light | A secondary, less intense light used to "fill in" shadows created by the key light. | Reduces harsh contrast, revealing details in the darker areas of the product without eliminating shadows completely. | | Light Modifier | A tool (like a softbox or umbrella) that is placed over a light source. | Diffuses and softens the light, creating a larger, more flattering source that wraps around the subject. | | Reflector | A simple card or disc (often white, silver, or gold) used to bounce light. | A budget-friendly way to act as a fill light, brightening shadows by redirecting light from your key source. |
With just these four items, you have a powerful foundation for controlling light and creating consistently professional product shots.
Choosing Your Light Source: Natural vs. Artificial
Every great product photo starts with one fundamental question: where is your light coming from? You've got two main paths—you can either work with the beautiful, free light from the sun or take full control by creating your own with artificial sources.
Neither one is flat-out better than the other. The right choice really comes down to your product, your brand's vibe, and the practical stuff, like your budget and when you need to shoot.
A lot of photographers, especially when they're just starting out, gravitate toward natural light. It makes sense. It’s free, it’s everywhere, and it has this soft, flattering quality that’s tough to beat. If you’re shooting lifestyle images or products with an organic feel—think handmade soaps, artisanal foods, or linen clothing—natural light is often a perfect fit.
Mastering Natural Window Light
The secret to great natural light photography isn't just finding a window; it's finding the right kind of light. Direct, harsh sunlight is your enemy here. It creates distracting, hard-edged shadows and can easily blow out the highlights on your product.
What you're really looking for is large, soft, indirect light. You can almost always find this near a north-facing window, which tends to provide gentle, consistent light throughout the day.
To get started, just set your product on a table next to the window. Then, grab a simple piece of white foam core or even a poster board and place it on the opposite side of your product. This little trick turns the board into a reflector, bouncing that soft window light back to fill in the shadows. It's a simple, low-budget way to get a clean, professional look.
Your goal is to find a balance. The window is your main light source (the "key light"), and the reflector acts as your fill light. By simply changing the reflector's angle and distance, you gain a surprising amount of control over the mood and contrast of the shot.
Diving Into Artificial Lighting
As beautiful as natural light is, it has one massive drawback: it’s completely unreliable. The light changes with the weather, the time of day, and even the season, making it nearly impossible to get consistent results day after day.
This is where artificial lighting becomes a game-changer. It gives you absolute control, letting you shoot whenever you want and get the exact same look every single time. Consistency is king in e-commerce, and this is how you achieve it.
When it comes to artificial lights, they generally fall into two camps:
- Strobes (or Flashes): These fire a powerful, split-second burst of light the moment you click the shutter. They pack a serious punch, which is awesome for freezing motion or using smaller apertures to get everything in sharp focus. The learning curve can be a bit steeper, though, because you can't see what the light is doing until after you’ve taken the photo.
- Continuous Lights: Just like the name says, these lights stay on the whole time, like a lamp. This "what you see is what you get" approach is incredibly beginner-friendly. You can literally see the highlights and shadows shift in real-time as you move the light around, making adjustments intuitive and fast.
The Rise of Continuous LED Lights
In the past, continuous lights were often hot, clunky, power-hungry, and didn't always render colors accurately. But modern LED technology has completely flipped the script.
Today’s high-quality LEDs are cool to the touch, energy-efficient, and offer exceptional color accuracy. This shift has been so impactful that LED solutions are projected to make up over 50% of the entire photography lighting market by 2026.
Their lightweight design, adjustable color temperatures, and cool operation (which is crucial for heat-sensitive products) make them a fantastic choice for just about any product shoot. You can explore more data on this market trend to see just how much LEDs are shaping the industry.
For most people selling online, a quality continuous LED light paired with a good softbox is the perfect foundation for a versatile and reliable product photography lighting setup.
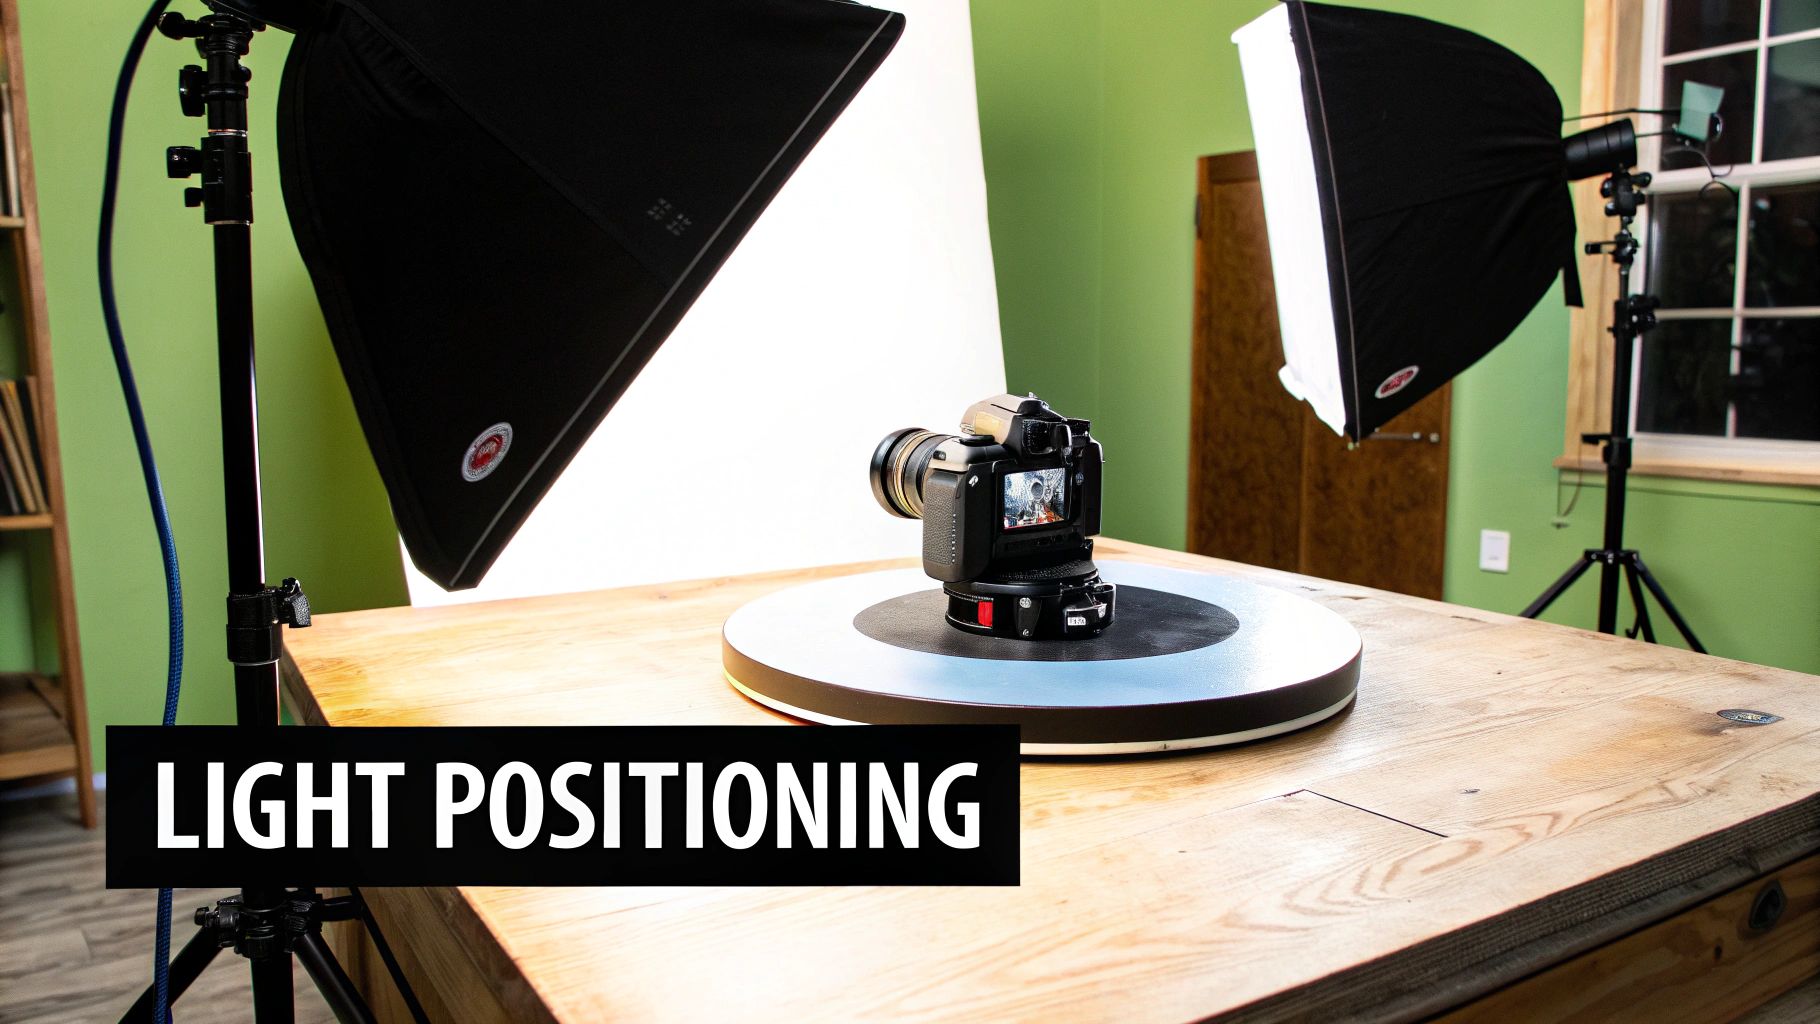
Putting Together Your First Pro Lighting Setup
Alright, you've got the scoop on the different types of lights. Now it's time for the fun part: putting them to work. This is where we stop talking theory and start building the exact lighting setups the pros use to get those crisp, clean, and consistent product shots.
We'll start simple and then build up. The goal here isn't just to copy a diagram; it's to give you a repeatable blueprint. I want you to be able to walk into any shoot and know exactly how to shape the light to make that product look incredible.
Starting with a Single Light
It might sound too simple, but you can get some seriously dramatic and professional-looking shots with just one light. A one-light setup is surprisingly versatile and forces you to really think about how light and shadow define an object's shape. It’s the best place to start.
The classic approach? Place your single light—ideally a continuous LED with a big softbox—at a 45-degree angle to the side of your product and just a bit above it. This setup is a go-to for a reason. It creates a beautiful, natural-looking gradient from light to shadow, a lot like light coming from a window, which gives the product fantastic definition.
But that's just the starting point. The product itself tells you where the light should go.
- Got Texture? If you're shooting something like a woven blanket or a piece of pottery, try moving the light to a sharper side angle, closer to 90 degrees. This is called side-lighting, and it rakes light across the surface, making every little detail and texture pop right out.
- Need More Drama? Try placing the light slightly behind the product. This creates a striking "rim light" effect that outlines its silhouette, which is perfect for separating dark products from dark backgrounds.
The secret weapon in a one-light setup is a reflector. A simple piece of white foam board is all you need. Place it on the opposite side of your light to bounce some of that light back into the shadows. This "fills" them in, keeping them from getting too dark or distracting. Move the reflector closer to brighten the shadows; pull it back to crank up the contrast.
Moving Up to a Two-Light Setup
Once you've mastered the one-light-and-a-reflector combo, adding a second light gives you a whole new level of control. This is the classic "key and fill" setup, which is the absolute backbone of professional studio photography.
Your original light is now your key light. It's still the star of the show, your main and most powerful light source, typically staying at that 45-degree angle to set the main highlights and shadows.
Your second light becomes the fill light. Its only job is to soften the shadows thrown by the key light. You'll place it on the opposite side of the product. The most important thing to remember here is that the fill light must be set to a lower power than the key light. If you make it too bright, you’ll wash out all the shadows and your product will look flat. A good rule of thumb is to start with the fill light at half the power of your key.
A great way to think about it is this: The key light is the sun—strong and directional. The fill light is the ambient light from the sky—soft and secondary. They work together to create a balanced, natural look.
The Classic Three-Point Lighting Setup
The final step is the full three-point lighting setup. This adds a third light that creates separation and gives your images that final professional polish. You'll have your key light, your fill light, and now, a backlight.
The backlight (also called a rim light or a hair light) is placed behind the product. You can aim it at the back of the product itself or at the background. Its job is to create a subtle, crisp highlight around the product's edges.
This little line of light does two critical things:
- It cleanly separates the product from the background, so it doesn't look like a flat sticker slapped on a backdrop.
- It adds a professional-looking sheen and emphasizes the product's form, which is a game-changer for things like glass, electronics, or anything with a glossy finish.
As you build out your setup, remember that different products have different needs. This is especially true for tricky items that require specialized jewelry photography, where a perfectly placed backlight is often the secret to making a gem truly sparkle.
This graphic breaks down the placement for a classic three-point setup perfectly.
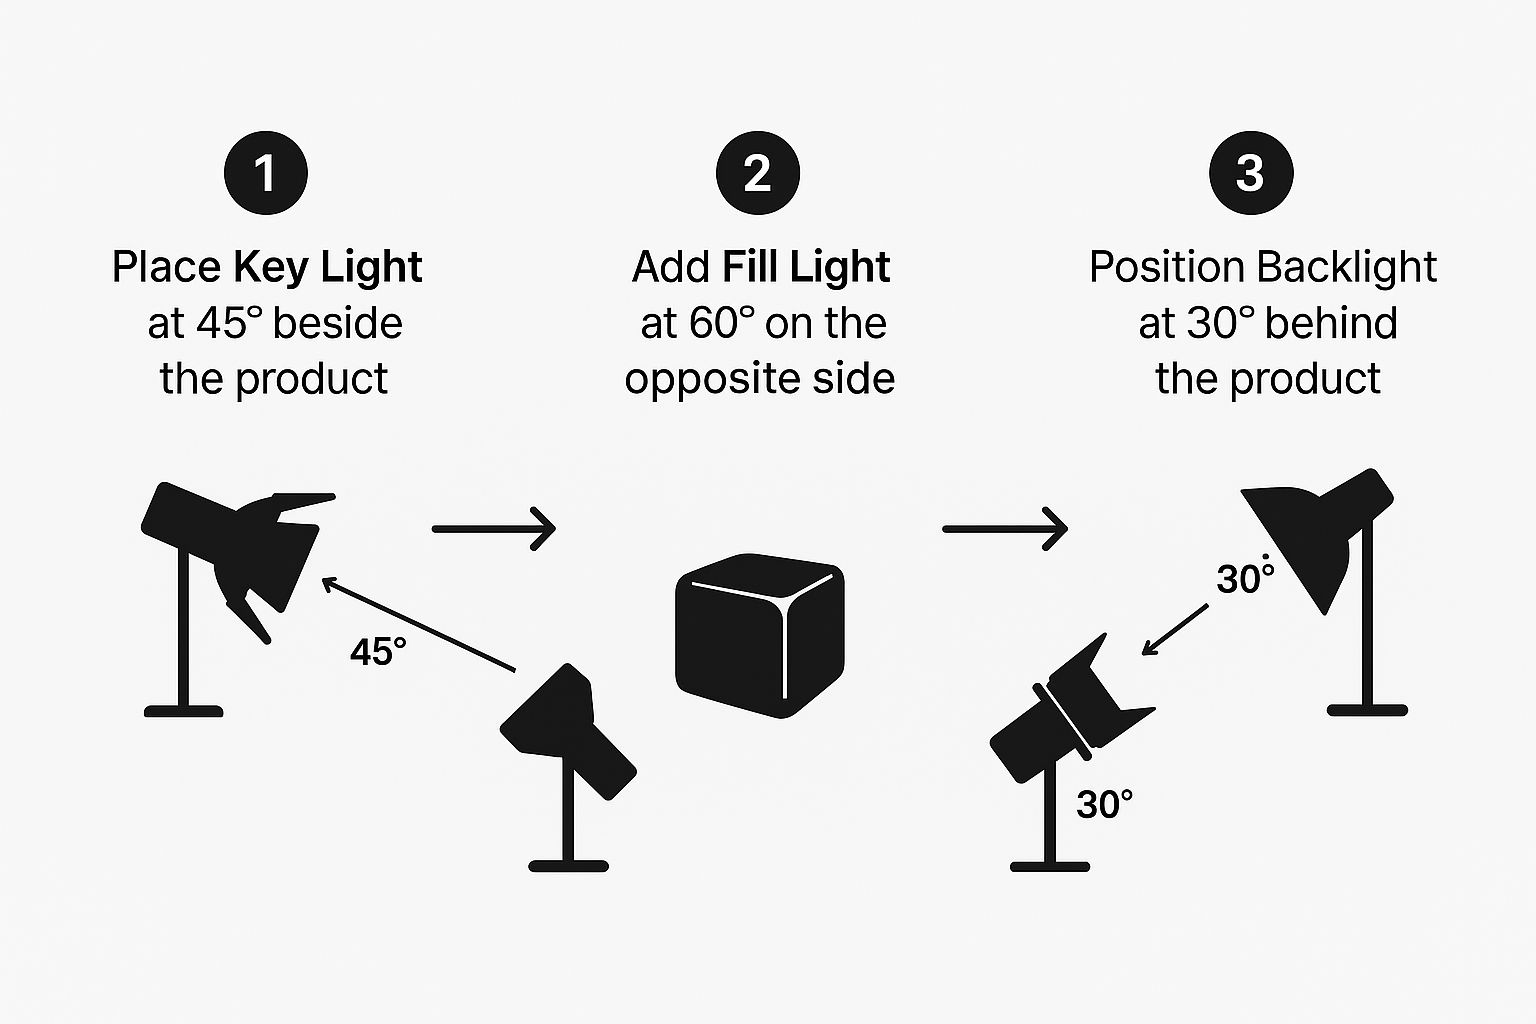
As you can see, every light has a purpose. Together, they sculpt the product, control the shadows, and create depth. Mastering this structured approach is how you'll get polished, high-quality results every single time.
How To Shape And Control Your Light
Just turning on a light isn't enough to get pro-level shots. Raw, uncontrolled light from a bare bulb is usually harsh, creating unflattering highlights and deep, distracting shadows.
The real magic in a product photography lighting setup happens when you learn to shape, soften, and direct that light with intention. This is how you go from just illuminating a product to sculpting it—creating mood, defining texture, and showing it in its best possible light.
You gain this control by using light modifiers, which are tools that attach to your light source to change its quality. Think of a modifier as a lens for your light. It can transform a small, harsh point of light into a large, soft source that wraps beautifully around your subject, creating gentle shadows and that high-end, polished look you're after.
The Essential Light Modifiers
The world of modifiers is huge, but for product photography, a few key players do most of the heavy lifting. Understanding what makes each one different is your key to picking the right tool for the job.
- Softboxes: These are the workhorses of any product photography studio. A softbox is basically a fabric box with a reflective inside and a white diffusion panel on the front. It takes the small, harsh light from your bulb and spreads it out, creating a beautiful, soft, and even light source. They come in all shapes and sizes, from large octaboxes perfect for clean light on apparel to long, narrow strip boxes that are ideal for creating precise highlights on a wine bottle.
- Umbrellas: Often one of the first modifiers a photographer buys, umbrellas are simple and incredibly effective. A shoot-through umbrella, made of white translucent fabric, softens the light as it passes through. A reflective umbrella (with a black back and silver or white interior) bounces the light, creating a broader, slightly less controlled spread than a softbox. They're fantastic for covering large areas with even light.
- Beauty Dishes: Just like the name implies, a beauty dish creates a quality of light that’s somewhere between hard and soft. It produces a focused, rounded light with more contrast than a softbox but softer edges than a bare bulb. This is perfect for adding a bit of pop and definition to products like cosmetics or watches, where you want to highlight shape and texture.
Light Modifier Comparison and Use Cases
Choosing the right modifier can feel daunting at first, but it really comes down to the effect you want to create. This table breaks down the most common options to help you decide which tool fits your needs.
| Modifier Type | Light Quality | Best For | Common Use Case | | :--- | :--- | :--- | :--- | | Softbox | Soft, directional | General-purpose, flattering light | E-commerce product shots on a white background, apparel | | Umbrella | Soft, broad | Large areas, quick setup | Group product shots, filling shadows | | Beauty Dish | Semi-hard, focused | Texture, definition, contrast | Cosmetics, watches, food photography | | Reflector | Bounced, soft fill | Filling in shadows | Brightening one side of a product without a second light | | Diffusion Panel | Extremely soft, diffuse | Highly reflective surfaces | Shooting jewelry, chrome, or glassware to avoid glare |
Ultimately, having a couple of different modifiers on hand gives you the flexibility to tackle any project that comes your way.
Shaping Light Beyond Modifiers
Your control doesn't stop with what you put on your light. The unsung heroes of many professional shoots are the simple, often inexpensive tools used to bounce, block, or further diffuse the light you’ve already created.
The global studio lighting market, valued at around USD 18.4 billion in 2024, shows just how much demand there is for these precise control tools. Continuous LED lights now hold a 55% share of this market, largely because their "what you see is what you get" nature makes it so much easier to visualize how these shaping tools will affect your final shot in real-time.
The secret to professional-looking photos isn't always adding more light—it's often about subtracting it or bouncing it into just the right spot. Meticulous control over shadows and highlights is what creates depth and dimension.
Your Go-To Light Shaping Tools
Here are the essential accessories you’ll want to have on hand to refine your lighting and solve common problems on the fly.
- Reflectors: A simple white, silver, or gold surface used to bounce light back into shadow areas. A piece of white foam core from a craft store is one of the most powerful and affordable tools you can own. It acts as a passive fill light, brightening dark spots without needing another light source.
- Flags and Gobos: These are just black, non-reflective objects (like black foam core or fabric) used to block light. Need to create a sharp shadow line or prevent light from spilling onto your background? A flag is your answer. This is called "negative fill," and it’s absolutely key for adding contrast and drama.
- Diffusion Panels: Sometimes even a big softbox is too harsh. A diffusion panel, which is just a large sheet of translucent fabric held on a frame, is placed between your light and the product. It acts as another layer of softening, creating incredibly gentle and even illumination that's perfect for highly reflective items like chrome or glass.
Mastering these tools is just as important as knowing which lights to buy. They give you the nuanced control needed to adapt to any product, surface, or creative vision. These lighting principles are also foundational when you move from stills to video, a topic we dive into in our guide to making effective e-commerce video ads.
Solving Common Lighting Problems
Even the most meticulously planned lighting setup can throw you a curveball. We've all been there: frustrating reflections on a beautiful bottle, or deep shadows that completely swallow up key details. It can feel like you've hit a wall.
But here’s the thing—these are the exact problems every pro learns to solve. The solutions are almost always simpler than you think, and knowing how to fix them on the fly will save you from pulling your hair out in Photoshop later.
Taming Unwanted Reflections and Glare
Reflections are the classic villain when you're shooting anything with a glossy surface—glass, metal, jewelry, you name it. The goal isn't to kill reflections entirely, because that just makes the product look bizarre and flat. You want to control them, using them to define the product's shape without being a massive distraction.
Here's the secret: you light the environment, not the product itself.
Think of your product as a perfect mirror. It's just showing you a picture of everything around it, including your lights. Create a big, soft, clean reflection, and you'll get a beautiful highlight instead of a harsh, ugly hotspot.
To do this, grab the biggest softbox or diffusion panel you own. Position it so your product reflects the clean, white surface of the modifier. You can even build a little "tent" around your product with white foam core boards to create a seamless world for it to reflect.
Another absolute lifesaver is a circular polarizing filter (CPL). It screws right onto your lens, and as you rotate it, you can literally dial reflections up or down. It gives you an incredible degree of control right there in the camera.
Softening Hard and Distracting Shadows
Nothing screams "amateur" faster than harsh, dark shadows. They make products look cheap and hide all the details you’re trying to show off. This almost always happens when your light source is too small or too close to your subject.
Just remember this one rule: the larger the light source is relative to the product, the softer the light and shadows will be.
If your shadows are looking way too sharp, here are a few quick fixes:
- Back the Light Up: Pulling your light further away from the product makes the light source effectively larger in relation to it. The result? Softer shadow edges.
- Add Diffusion: Stick a diffusion panel between your light and your product. It instantly spreads the light out and softens its quality. Simple, but it works every time.
- Bring in a Reflector: Don't have a second light? No problem. Use a white foam board to bounce some light back into the shadows. This "fills" them in and dials back their intensity.
Achieving a Pure White Background
For just about any e-commerce platform, a pure #FFFFFF white background is the gold standard. Nailing this in-camera is a huge time-saver. The trick is to light your background and your product completely separately.
You’ll never get a perfectly white background just by blasting all your lights at the product and hoping for the best. It just doesn't work that way.
Instead, you need to dedicate at least one light (two is even better for a smooth, even look) just for the background. Place your product a good few feet in front of the backdrop to stop that background light from spilling all over it. Your goal is to make the background significantly brighter than the product.
Check your camera's histogram. You want to expose the shot so your product looks perfect, while the spike representing the background is pushed all the way to the far-right edge. This means the background is "blown out" to pure white, while your product keeps all its beautiful detail. This is a foundational technique for clean, professional product shots.
Answering Your Top Lighting Questions
Jumping into product photography lighting can feel like a deep dive. You've got questions, and that's a good thing. What if you're on a tight budget? How do you deal with super reflective products? Are strobes or continuous lights the way to go?
Let's clear up some of the most common questions I hear from photographers. These are the practical, real-world answers you need to get professional results without the headache.
What Is The Best Budget-Friendly Lighting Setup?
You absolutely do not need to drop thousands of dollars to get started. In fact, one of my favorite go-to setups is incredibly affordable: a single, powerful continuous LED light paired with a large softbox. This one light is a total workhorse, and you can create a huge range of professional looks with it.
The secret weapon? A simple white foam core board from any art supply store. This board becomes your reflector. You use it to bounce light back into the shadows, creating a beautiful, clean fill effect without needing a second light. It’s a trick the pros use constantly.
Of course, the most budget-friendly option is completely free: natural light from a window.
- Look for a North-Facing Window: This gives you soft, indirect light that’s incredibly flattering for just about any product.
- Get Your Product Close: Position your item on a table near the window to catch that beautiful, soft light.
- Use Your Reflector: Just like with the LED setup, use that foam board on the opposite side to kick some light back and brighten up the shadows.
This approach is killer for lifestyle shots and can produce stunning, high-end results with zero lighting investment. As you plan your budget, it's also smart to know what professionals are charging; understanding the average photographer cost can help you decide how much to invest in your own gear versus hiring out.
How Do I Light A Product With A Shiny Surface?
Photographing reflective things like glass, metal, or jewelry is a classic challenge. Here’s the mindset shift you need: stop trying to light the product. Start lighting what the product reflects.
A shiny object is just a mirror. So, you want it to reflect something big, clean, and beautiful.
Use the largest, most diffused light sources you have—think big softboxes or diffusion panels. Position them so your product reflects their soft, white surface. This creates a gorgeous, clean gradient highlight instead of a harsh, ugly hotspot. You can even build a little "tent" with white cards to surround your product, giving you total control over every reflection.
A circular polarizing filter (CPL) is a complete game-changer here. It screws onto your lens, and as you rotate it, you can literally dial down or even eliminate specific glare. It’s like having a magic wand for reflections, giving you precise control right inside the camera.
Should I Use Continuous Lights Or Strobes?
Both are fantastic tools, but they shine in different scenarios. For most e-commerce work, especially if you're starting out, continuous LED lights are the way to go.
Because they stay on, you see exactly how the light and shadows are falling on your product in real-time. It’s a "what you see is what you get" approach that makes learning and adjusting incredibly intuitive. Plus, if you ever plan to shoot video, LEDs are a must.
Strobes, on the other hand, pack a massive punch of power in a split second. This is amazing for freezing motion and lets you use smaller apertures (like f/11 or f/16) to get a super deep depth of field, keeping your entire product tack sharp. While strobes used to have a big lead in color accuracy, modern high-quality LEDs have pretty much closed that gap.
For a versatile and easy-to-learn product photography lighting setup, a good continuous LED system is more than capable.
How Do I Get A Pure White Background?
To get that perfect, #FFFFFF e-commerce white background, you have to light it separately from your product. This is non-negotiable.
A common pro technique is to aim two lights exclusively at your white backdrop. Your main "key" light is separate and only illuminates your product.
Make sure to place your product several feet away from the background. This prevents the light from the background from spilling onto your product and creating nasty edge glare. Your goal is to overexpose the background by about one stop compared to your product. Check your camera's histogram to confirm the background data is pushed all the way to the right edge.
This technique creates clean, commerce-ready images that need minimal editing, letting your amazing photos work hand-in-hand with great copy. You can learn more about how those two elements connect in our guide on how to write product descriptions that actually sell.