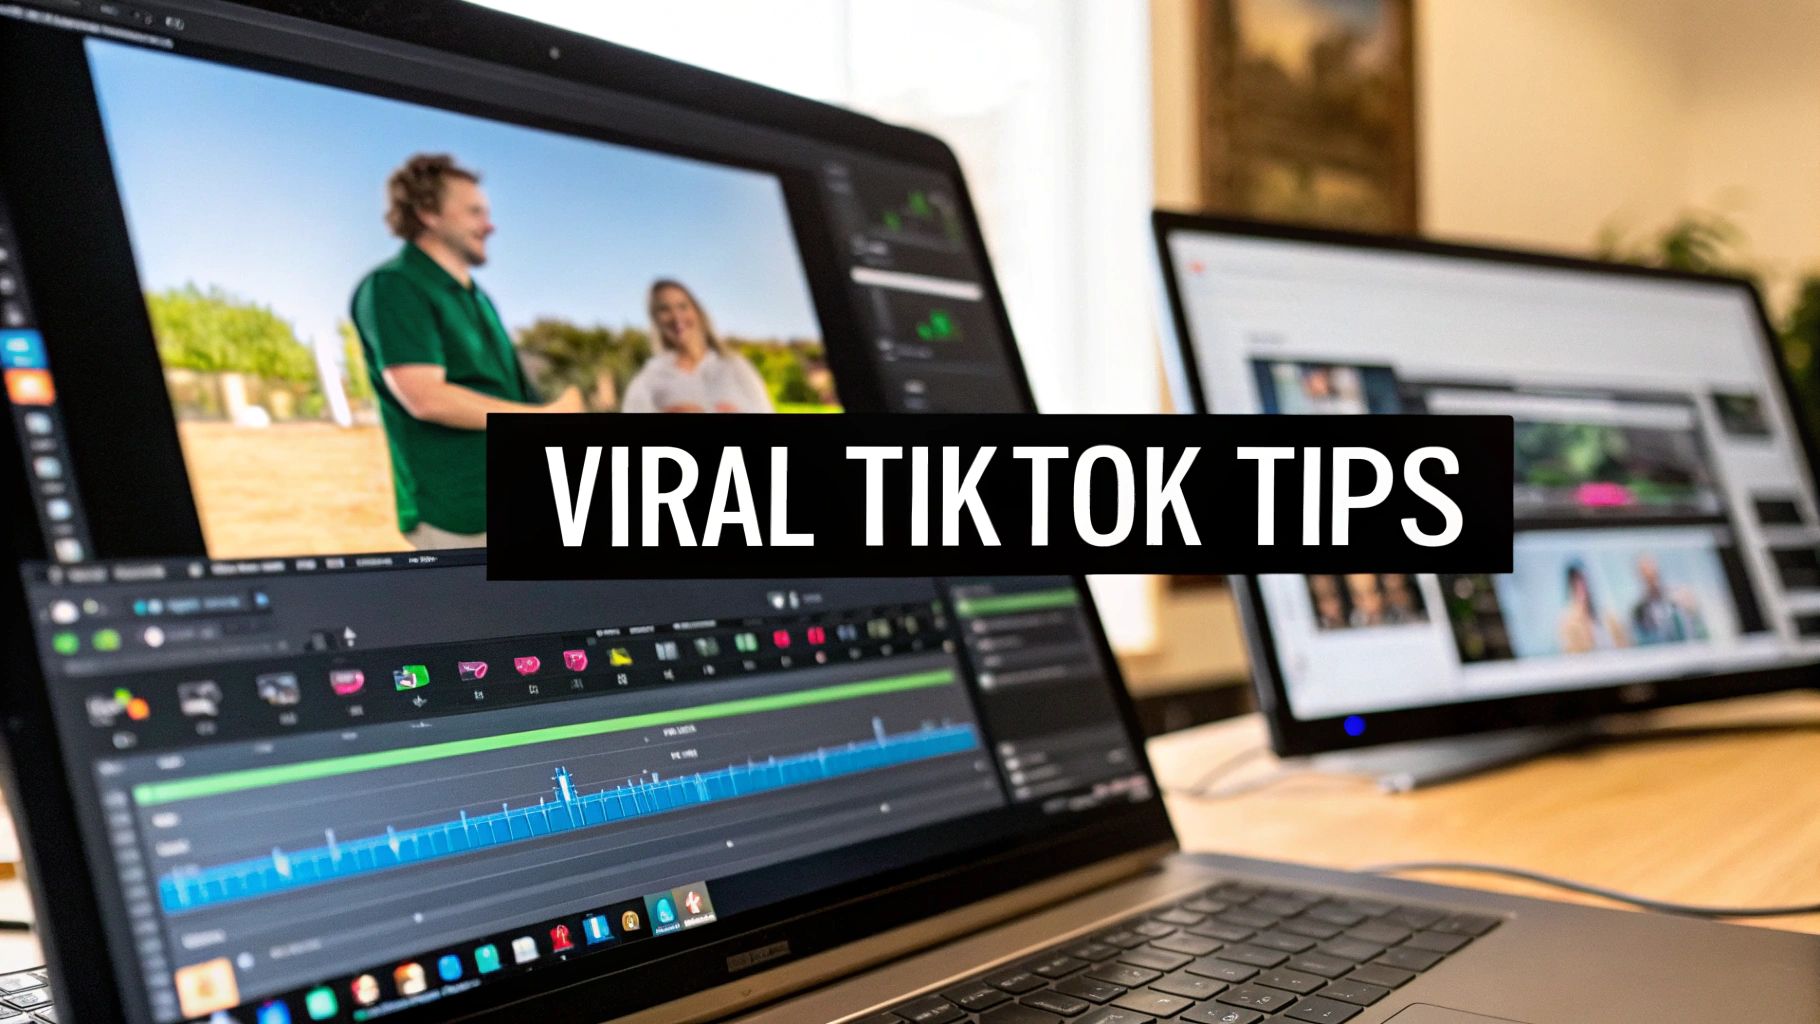
8 Essential TikTok Video Editing Tips to Go Viral in 2025
Master the algorithm with these 8 pro TikTok video editing tips. Learn to use jump cuts, captions, sound design, and more to boost engagement and go viral.
TikTok's 'For You' page is a battleground for attention, and victory often goes to the best-edited content. Simply pointing and shooting is no longer enough. To capture and hold an audience, you need to master the art of dynamic, engaging, and algorithm-friendly editing. This isn't about having the most expensive software; it's about using the right techniques to tell a compelling story in seconds.
This guide provides actionable TikTok video editing tips that go beyond the basics, offering specific strategies to make your content stand out. We will explore everything from creating hypnotic visual rhythms with pattern cuts to leveraging split-screen effects for dramatic comparisons. You will learn how to master sound design, use transitions that stop the scroll, and optimize your workflow with modern tools.
Whether you're a creator building a personal brand, a marketer driving sales, or a social media manager aiming for engagement, these eight techniques are your blueprint for creating videos that don't just get watched, but get remembered and shared. Each tip is designed to be immediately applicable, helping you transform average clips into content with viral potential. Let's dive into the edits that make a difference.
1. Jump Cuts and Transitions
Jump cuts are a cornerstone of modern video editing, especially on TikTok where attention spans are notoriously short. This technique involves cutting from one shot to a slightly different shot of the same subject, creating a "jump" in time. This rapid-fire editing style eliminates dead air, filler words like "um" or "ah," and unnecessary pauses, resulting in a video that feels energetic and packed with value.
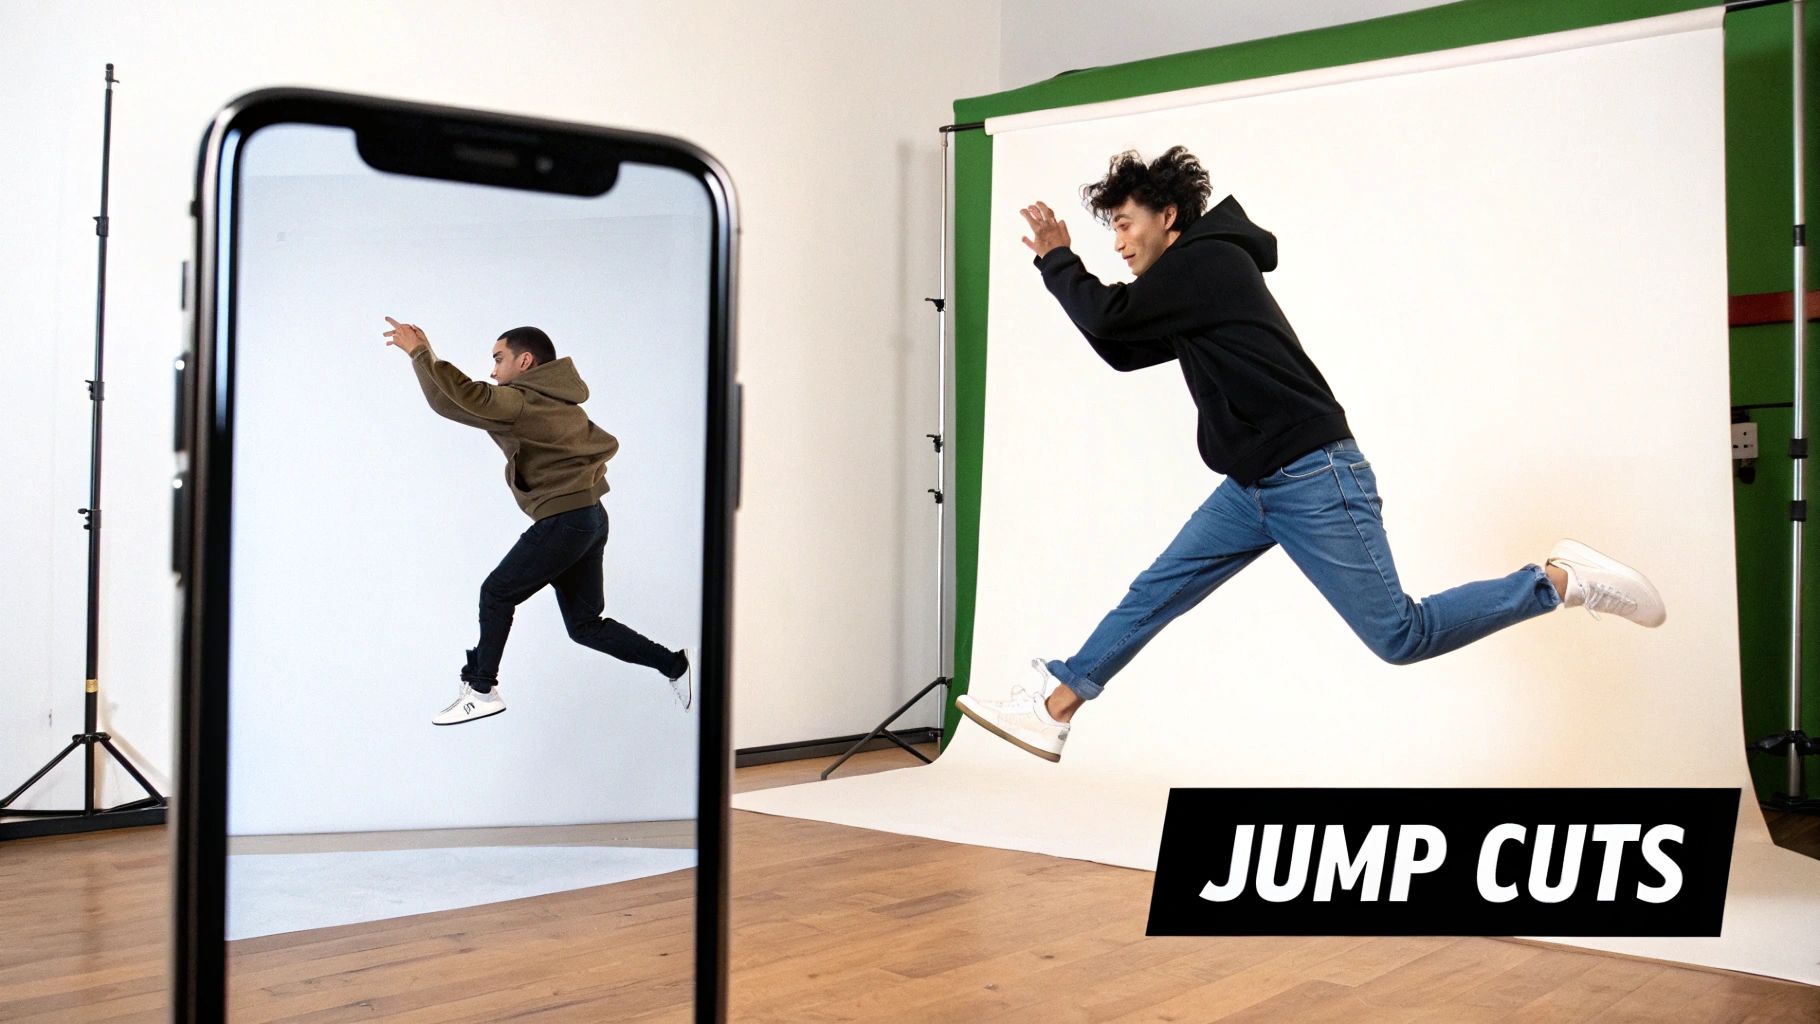
The primary benefit is improved viewer retention. By removing every non-essential moment, you hold the audience's focus and make your content feel more dynamic and professional. This technique is one of the most powerful TikTok video editing tips for keeping your audience hooked from the first second to the last.
How to Implement Jump Cuts and Transitions
Implementing jump cuts is straightforward. When filming, simply pause briefly between sentences or ideas. In your editing software, you'll slice out these pauses, bringing the clips together for a seamless, fast-paced narrative.
- Beauty Creators: Use jump cuts to transition instantly between different stages of a makeup tutorial, showing the application of foundation, then eyeshadow, then lipstick without any downtime.
- Fitness Influencers: Quickly switch between different exercises in a workout routine. For example, a jump cut can take you from the last push-up directly to the first squat.
- Comedy Skits: Create rapid-fire dialogue or show a character instantly changing outfits or locations to enhance comedic timing.
Pro Tip: For a smooth and natural effect, always "cut on action." This means making your edit at the point of a movement, such as a hand gesture or a turn of the head. This makes the transition feel almost invisible to the viewer.
To maximize their impact, sync your jump cuts to the beat of a trending song or audio. This rhythmic editing creates a satisfying, almost hypnotic effect that resonates strongly with the TikTok algorithm and audience alike.
2. Text Overlays and Captions
Text overlays are a vital tool for communicating your message effectively on TikTok. This technique involves placing words, phrases, or captions directly onto your video to provide context, highlight key points, or add a layer of humor. Given that many users watch videos without sound, well-placed text ensures your content is accessible and understandable to the widest possible audience.
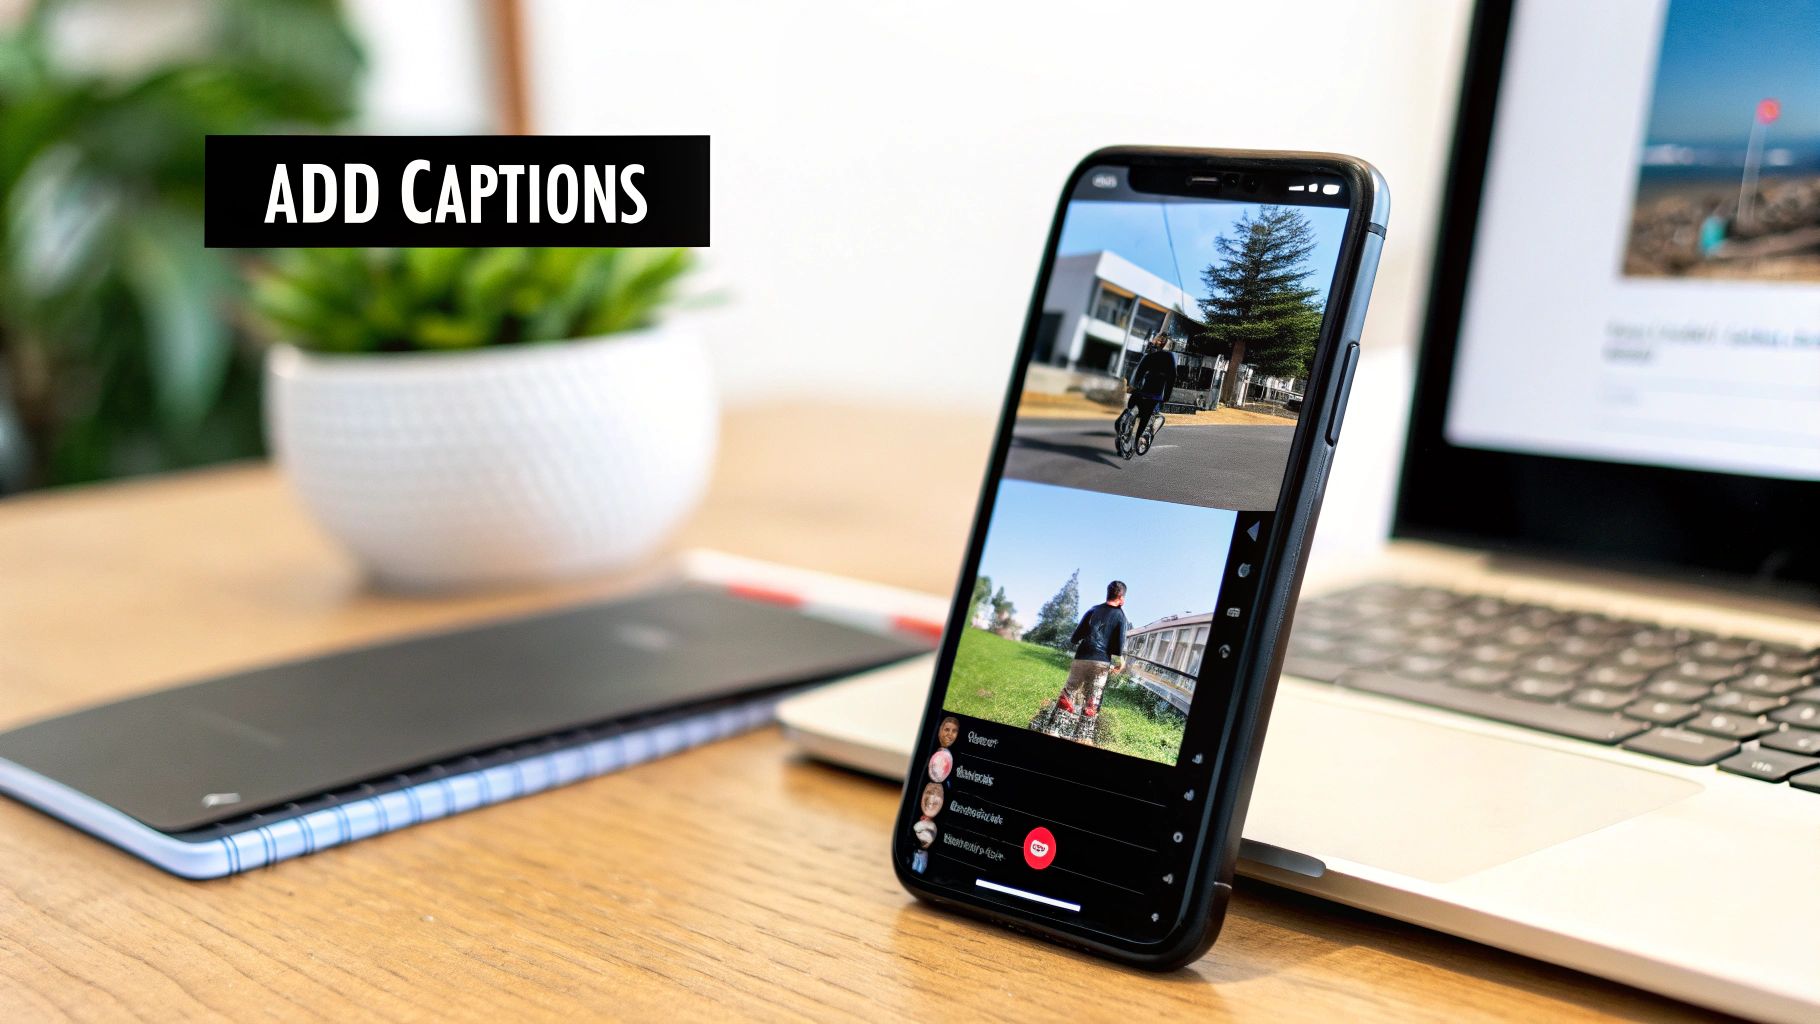
The primary benefit is enhanced storytelling and accessibility. Text can reinforce your spoken words, deliver a punchline, or guide the viewer's attention, all while making your video consumable in a silent environment. This is one of the most crucial TikTok video editing tips for maximizing engagement and message retention.
How to Implement Text Overlays and Captions
Implementing text is simple using TikTok’s native editor or third-party apps. The key is to make the text a seamless and valuable part of the viewing experience, not a distraction. You can style fonts, colors, and animations to match your brand and the video's tone.
- Educational Creators: Use text to list key facts, definitions, or steps in a process. This helps viewers absorb information quickly and serves as a visual reference they can easily revisit.
- Storytime Creators: Build suspense or reveal plot twists with timed text overlays. A sentence appearing at just the right moment can dramatically increase the impact of your story.
- Tutorial Creators: Label ingredients, tools, or on-screen actions. For a cooking video, this could mean displaying measurements as you add each ingredient to the bowl.
Pro Tip: Keep your text concise and highly legible. Use bold fonts and high-contrast color combinations (like white text with a black outline) to ensure your words stand out against any background and are readable even on small mobile screens.
For maximum impact, time your captions to appear in sync with your speech, a technique known as dynamic or "pop-up" captions. This creates a more engaging and professional feel, encouraging viewers to read along and stay locked into your content.
3. Speed Ramping and Time-Lapse
Speed ramping and time-lapse are powerful storytelling tools that manipulate time to create dramatic, engaging, and highly watchable TikTok content. Speed ramping involves dynamically changing the video's playback speed, slowing down for emphasis and speeding up to move through less critical moments. A time-lapse condenses a long process into a few captivating seconds.
The primary benefit is enhanced narrative pacing. These techniques allow you to highlight the most important parts of your video while quickly bypassing repetitive or mundane steps. This is one of the most effective TikTok video editing tips for showing a process, transformation, or journey without losing your audience's attention.
How to Implement Speed Ramping and Time-Lapse
To use speed ramping effectively, plan your shots with speed changes in mind. Film key moments with deliberate action that will look impactful in slow motion. For time-lapses, ensure your camera is stable to avoid a shaky final product.
- Cooking Creators: Use a time-lapse to show the entire process of chopping vegetables and preparing ingredients, then slow down to normal speed to perfectly showcase the final plating.
- Art and DIY Influencers: Condense hours of painting, drawing, or building into a mesmerizing time-lapse, allowing viewers to see the entire creation come to life in seconds.
- Transformation Videos: Speed ramp through the "before" phase and slow down dramatically for the "after" reveal, maximizing the impact of the change.
Pro Tip: Sync your speed changes to the beat drops or rhythm shifts in your chosen audio. Speeding up during the build-up of a song and slowing down for the chorus creates a polished, professional feel that keeps viewers locked in.
When editing, don't be afraid to experiment with different speeds. Use 2x or 4x speed for transitional moments and reserve the slow-motion effect (0.5x) for actions that deserve extra focus, like a perfect weightlifting form or a satisfying product application.
4. Color Grading and Filters
Color grading is the process of altering and enhancing the color of your video to create a specific mood, aesthetic, or visual tone. This goes beyond simple brightness adjustments, involving changes to saturation, contrast, and hue to tell a more compelling story. On a platform as visual as TikTok, a well-defined color palette can make your content instantly recognizable and far more engaging.
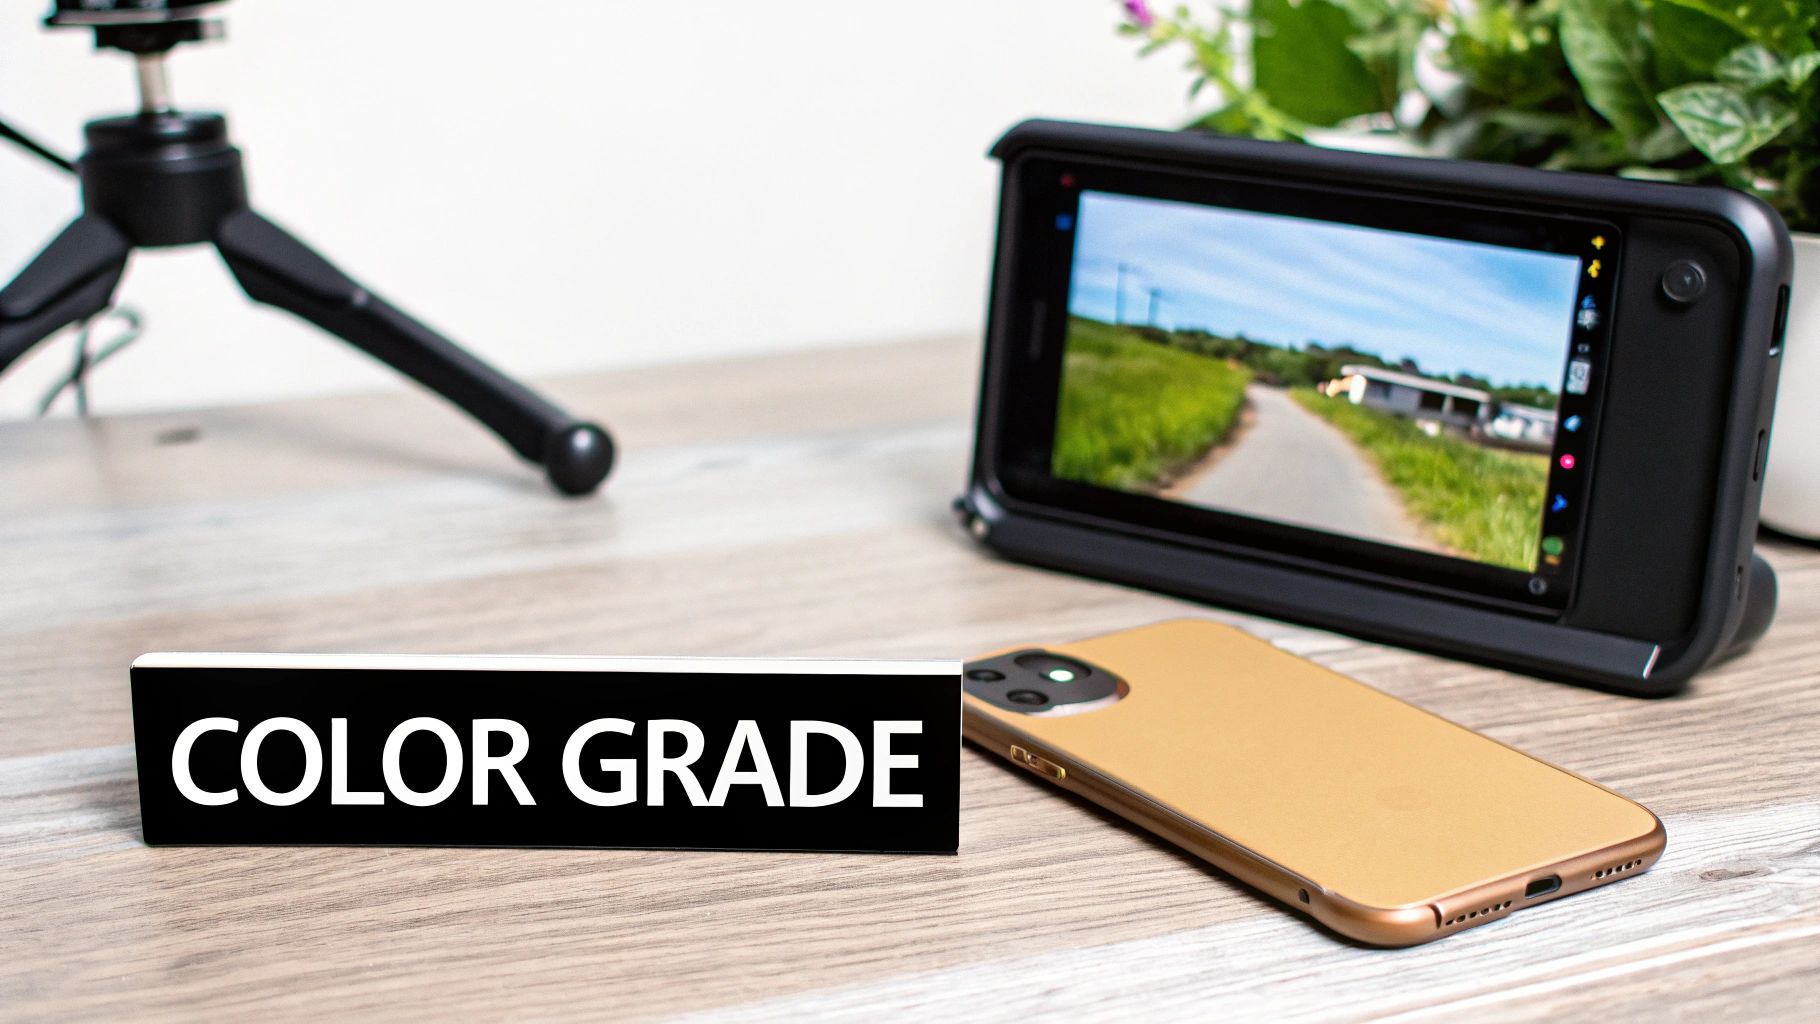
The primary benefit is brand consistency and emotional impact. A signature color grade helps build a cohesive brand identity, making your videos stand out on the "For You" page. Different color schemes evoke specific emotions, warm tones can feel energetic and inviting, while cool, desaturated tones can feel dramatic or serious, adding another layer to your storytelling.
How to Implement Color Grading and Filters
You can start with TikTok’s built-in filters or use third-party apps for more advanced control. The goal is to develop a consistent look that aligns with your brand's personality. Start by defining the mood you want to convey and choose a color palette that supports it.
- Fashion Creators: Use warm, golden filters to create a luxurious and aspirational feel for lookbooks or product showcases.
- Comedy Skits: Employ cool, desaturated tones to enhance the deadpan or awkward humor in a sketch, similar to a cinematic comedy.
- Lifestyle Influencers: Apply a consistent, aesthetic filter across all videos to create a recognizable and visually pleasing feed that feels like a personal brand.
Pro Tip: When starting with color grading, less is more. Avoid over-saturating or pushing colors to unrealistic levels. Begin with subtle adjustments in apps like CapCut, VSCO, or Adobe Lightroom and gradually refine your signature style. Test your final video on different devices to ensure the colors look good everywhere.
This is one of the key TikTok video editing tips for elevating your content from amateur to professional. A deliberate color strategy not only makes your videos more beautiful but also strengthens your connection with your audience by establishing a consistent visual language.
5. Sound Design and Audio Layering
Sound is arguably half of the TikTok experience, and strategic sound design is what separates amateur videos from viral masterpieces. This technique involves layering multiple audio elements like your original audio, a trending song, subtle sound effects, and a clear voiceover to create a rich, immersive auditory landscape that captivates your audience.
The primary benefit is enhanced emotional impact and engagement. Proper audio mixing guides the viewer's attention, reinforces on-screen actions, and can make your content feel more polished and professional. Since the TikTok algorithm heavily favors videos using its library of trending sounds, mastering this skill is one of the most effective TikTok video editing tips for boosting visibility.
How to Implement Sound Design and Audio Layering
Start by treating each audio element as a separate layer. In your editing app, you can adjust the volume of your original video, the background music, and any added sound effects independently to achieve the perfect balance.
- Comedy Creators: Layer punchlines with perfectly timed sound effects (like a boing or cricket chirp) to maximize comedic impact and audience reaction.
- Tutorial Creators: Place a soft, non-distracting instrumental track underneath a crisp, clear voiceover to keep viewers engaged without overpowering the instructions.
- Emotional Storytelling: Use a rising cinematic score to build tension or a soft piano melody to evoke sadness, directly manipulating the viewer's emotional response to the narrative.
Pro Tip: Always test your final audio mix on your phone's speakers without headphones. Most users will be watching on their mobile devices, so ensuring your sound is clear and balanced in that environment is crucial for the best viewer experience.
To truly elevate your content, delve deeper into the nuances of sound effects video editing, exploring how strategic placement can transform a video's impact. Layering sound isn't just about adding noise; it's about building a world and guiding emotion with purpose.
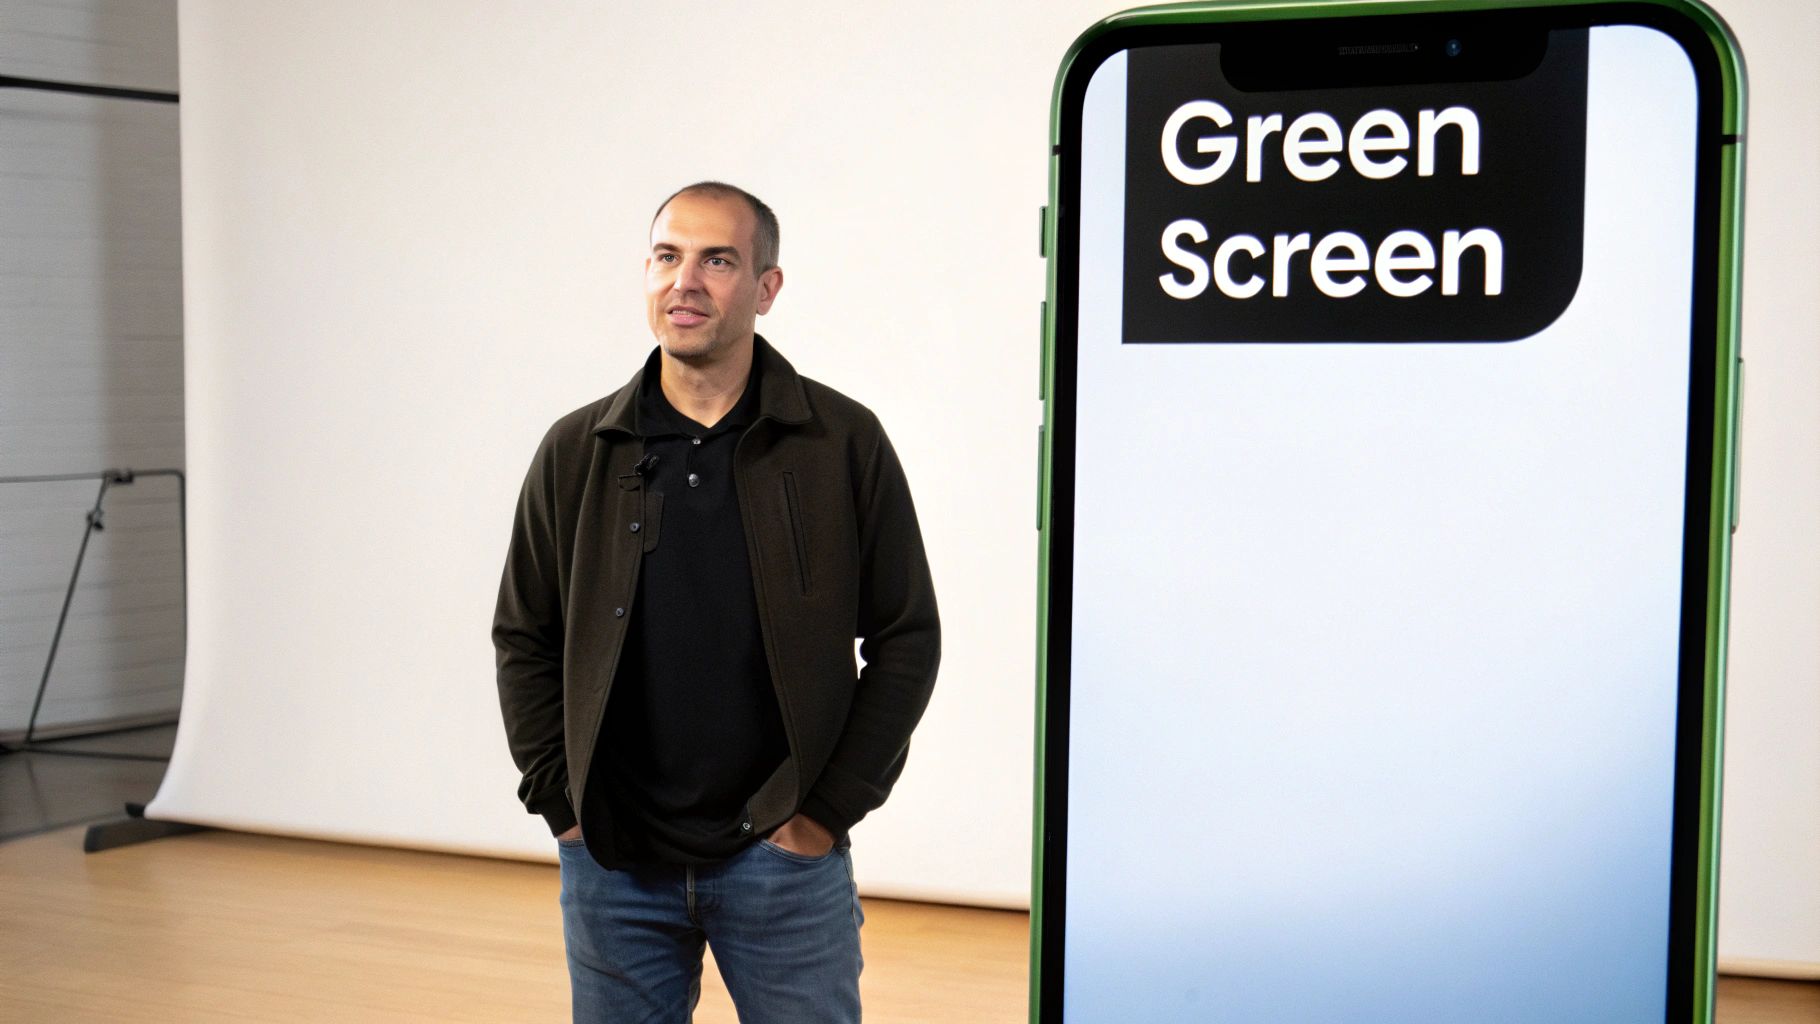
6. Green Screen and Background Replacement
The Green Screen effect, also known as chroma key, is a transformative tool that lets you replace your real-world background with any image or video clip. TikTok has made this high-production technique incredibly accessible with its built-in green screen filters, removing the need for physical equipment and allowing for endless creative possibilities right from your phone.
The primary benefit of this technique is enhanced storytelling and visual context. By placing yourself in any environment imaginable, you can make your content more immersive, informative, or humorous. This is one of the most versatile TikTok video editing tips for elevating your video's production value and creative appeal without a big budget.
How to Implement Green Screen and Background Replacement
Using the green screen effect within TikTok is simple. Before recording, tap the "Effects" icon and search for "Green Screen." You can then select an image or video from your camera roll to serve as the new background. For a cleaner result, ensure your subject is well-lit and stands out from the real background.
- Educational Creators: Place yourself in front of historical photos, scientific diagrams, or geographical maps to provide powerful visual context for a lesson.
- Commentary Accounts: Use the green screen to display news articles, social media posts, or video clips that you are discussing, making your commentary more direct and engaging.
- Fashion Influencers: Showcase a new outfit against a variety of virtual backgrounds, from a Parisian street to a tropical beach, highlighting its versatility.
Pro Tip: Lighting is crucial for a clean effect. Film in a well-lit space with even lighting on your face and body. This helps the app's AI more accurately separate you from your actual background, preventing a blurry or "glitchy" outline.
To make your green screen content even more dynamic, use a moving video as your background. A subtle, slow-moving background can add a professional touch, but avoid anything too busy or fast, as it can distract from your message and be jarring for the viewer.
7. Pattern Cuts and Visual Rhythm
Pattern cuts involve editing your video to sync perfectly with the beats of a song or audio track, creating a powerful visual rhythm. By timing your cuts, transitions, and on-screen actions to the music, you establish a satisfying cadence that makes the video feel cohesive, polished, and highly engaging. This technique transforms a simple video into a more intentional and captivating viewing experience.
The main benefit is enhanced viewer satisfaction. Rhythmic editing taps into the human brain's natural appreciation for patterns and music, making the content feel more professional and enjoyable to watch. This is one of the most effective TikTok video editing tips for making your content stand out and feel like a high-production piece.
How to Implement Pattern Cuts and Visual Rhythm
To implement pattern cuts, start by choosing your audio. In your editing app, view the audio's waveform to identify the primary beats. Mark these beats and use them as your guide for when to cut or transition to the next clip.
- Dance Creators: Cut to a new angle or clip on every single beat or half-beat of a song to highlight the choreography and create a dynamic, energetic sequence.
- Transition Videos: Use the distinct beats of a trending sound to time dramatic outfit changes, makeup reveals, or location swaps, making the transition feel impactful.
- Comedy Skits: Build anticipation for a punchline by using a series of quick, rhythmic cuts in the moments leading up to it, creating a comedic tempo.
Pro Tip: Don't limit yourself to just hard cuts. Vary your edits by mixing in different types of transitions, speed ramps, and zooms, all timed to the music's rhythm. This adds complexity and keeps the viewer engaged without becoming repetitive.
For the best results, use an editor like CapCut that clearly displays the audio waveform, allowing you to place your cuts with precision. Start with a simple beat pattern and, as you get more comfortable, experiment with more complex rhythms to match the nuances of the audio.
8. Before/After Comparisons and Split-Screen Effects
Before-and-after comparisons are a powerful storytelling tool on TikTok, creating instant visual satisfaction for viewers. This technique showcases a dramatic transformation, either sequentially or using a split-screen effect, to highlight a clear and compelling change. It grabs attention immediately by creating a contrast that the human eye is naturally drawn to.
The core benefit of this method is its ability to demonstrate value instantly. Whether it’s a product's effectiveness, a skill's impact, or a service's result, the visual proof is undeniable and highly persuasive. This is one of the most effective TikTok video editing tips for creating "wow" moments that encourage shares and comments.
How to Implement Before/After and Split-Screen Effects
Implementing this technique requires planning your shots. Film the "before" state first, then capture the "after" state from the exact same angle and lighting for the most impactful comparison. You can then place these clips side-by-side (split-screen) or reveal the "after" shot following the "before" with a dynamic transition.
- Beauty Creators: A classic split-screen can show half a face with makeup and half without, or a quick cut can reveal a full glam transformation from a bare-faced start.
- Home Organization Brands: Show a cluttered closet or messy pantry, then use a wipe transition to reveal the same space perfectly organized with your products.
- Fitness Coaches: Display a client's physique at the start of a program next to their results after several months, proving the effectiveness of your training.
Pro Tip: Align the most dramatic point of the transformation with a beat drop in your chosen audio. This synchronization makes the reveal feel more satisfying and impactful, increasing the likelihood that viewers will watch it again.
For an even more engaging effect, use text overlays to label "Before" and "After" clearly. This removes any ambiguity and helps viewers immediately grasp the story you are telling, making your content easy to digest and share.
8 TikTok Video Editing Tips Compared
| Technique | 🔄 Implementation Complexity | ⚡ Resource & Skill Requirements | 📊 Expected Outcomes | 💡 Ideal Use Cases | ⭐ Key Advantages | |---|---:|---:|---|---|---| | Jump Cuts and Transitions | Low–Medium — needs multi-take planning | Minimal tools; multiple angles; quick edits | Increases retention; snappier pacing | Short tutorials, comedy, fitness | Tight pacing and polish ⭐⭐ | | Text Overlays and Captions | Low — simple placement and timing | Minimal tools; careful proofreading | Better accessibility and clarity (works on mute) | Educational, storytime, tutorials | Emphasizes messages; boosts engagement ⭐⭐ | | Speed Ramping and Time-Lapse | Medium–High — timing and smooth ramping | Moderate — stabilization, planning, editing time | Cinematic drama; condenses long processes effectively | Cooking, art, transformations | Highlights key moments; cinematic impact ⭐⭐⭐ | | Color Grading and Filters | Medium — requires color knowledge | Moderate — apps or plugins; testing across devices | Consistent aesthetic; stronger mood and visibility | Fashion, lifestyle, cinematic clips | Professional, brand-consistent look ⭐⭐ | | Sound Design and Audio Layering | Medium–High — mixing and balance skills | Moderate — audio tracks, sound libraries, editing tools | Greater emotional impact; algorithmic reach via trending sounds | Comedy, dance, storytelling, tutorials | Boosts engagement & discoverability ⭐⭐⭐ | | Green Screen and Background Replacement | Low–Medium — easier with built-in filters; lighting matters | Low if virtual; needs good lighting and contrasts | Flexible settings; creative storytelling options | Comedy, education, commentary | Enables varied settings without location costs ⭐⭐ | | Pattern Cuts and Visual Rhythm | Medium–High — requires beat-syncing and timing sense | Low–Moderate — music selection, waveform tools | Professional, memorable flow; increased retention | Music, dance, comedic timing, transitions | Establishes rhythmic signature; satisfying edits ⭐⭐⭐ | | Before/After & Split-Screen Effects | Low–Medium — alignment and timing critical | Minimal tools; requires high-quality footage both sides | Clear demonstration of results; highly shareable | Beauty, fitness, renovations, crafts | Immediate visual proof of transformation ⭐⭐⭐ |
Editing Is Just the Beginning: Automate Your Path to Virality
You've just navigated a comprehensive toolkit of powerful tiktok video editing tips, from mastering dynamic jump cuts and transitions to layering intricate sound design. We've explored how text overlays keep viewers engaged, how speed ramping creates dramatic pacing, and how thoughtful color grading establishes a signature brand aesthetic. Each of these techniques, whether it's the visual intrigue of a pattern cut or the clarity of a split-screen comparison, is a building block for creating content that doesn't just get watched, but gets remembered. The core takeaway is this: great TikTok content is an intentional craft. It’s the result of strategic choices made frame by frame, second by second.
However, the secret to sustained growth on a platform as demanding as TikTok isn't just about mastering individual editing skills. It's about building a sustainable system that allows you to produce high-quality, engaging content consistently, without succumbing to creative burnout. This is where your workflow becomes as important as your editing prowess. Manually applying these tips to every single video is time-consuming and can stifle the very creativity you’re trying to unleash. The most successful creators and marketers understand that efficiency is the key to scaling their impact.
From Manual Mastery to Automated Excellence
The next step in your journey is to integrate these editing principles into an intelligent and automated workflow. Instead of spending hours on repetitive tasks, you can leverage technology to handle the heavy lifting. This allows you to shift your focus from tedious execution to high-level strategy, creative ideation, and community engagement. For those looking to significantly enhance their video production efficiency and leverage cutting-edge technology, exploring the best AI video editing software tools can be a transformative step, revealing how automation can amplify your creative output.
Think of it this way: the tiktok video editing tips you've learned are your creative palette. Automation tools are the sophisticated brushes that help you apply those colors faster and more effectively than ever before. By automating tasks like generating captions, creating dynamic slideshows from product images, or even ideating viral hooks, you free up invaluable time. This is how you move from being just a content creator to a strategic content architect, building a powerful presence that drives real results.
Ready to turn these advanced editing tips into a scalable content machine? ViewPrinter is designed to automate the most time-consuming parts of video creation, from generating UGC-style ads to scheduling your content, so you can focus on what matters most: growing your brand. Transform your workflow and start creating viral-worthy content in minutes with ViewPrinter.