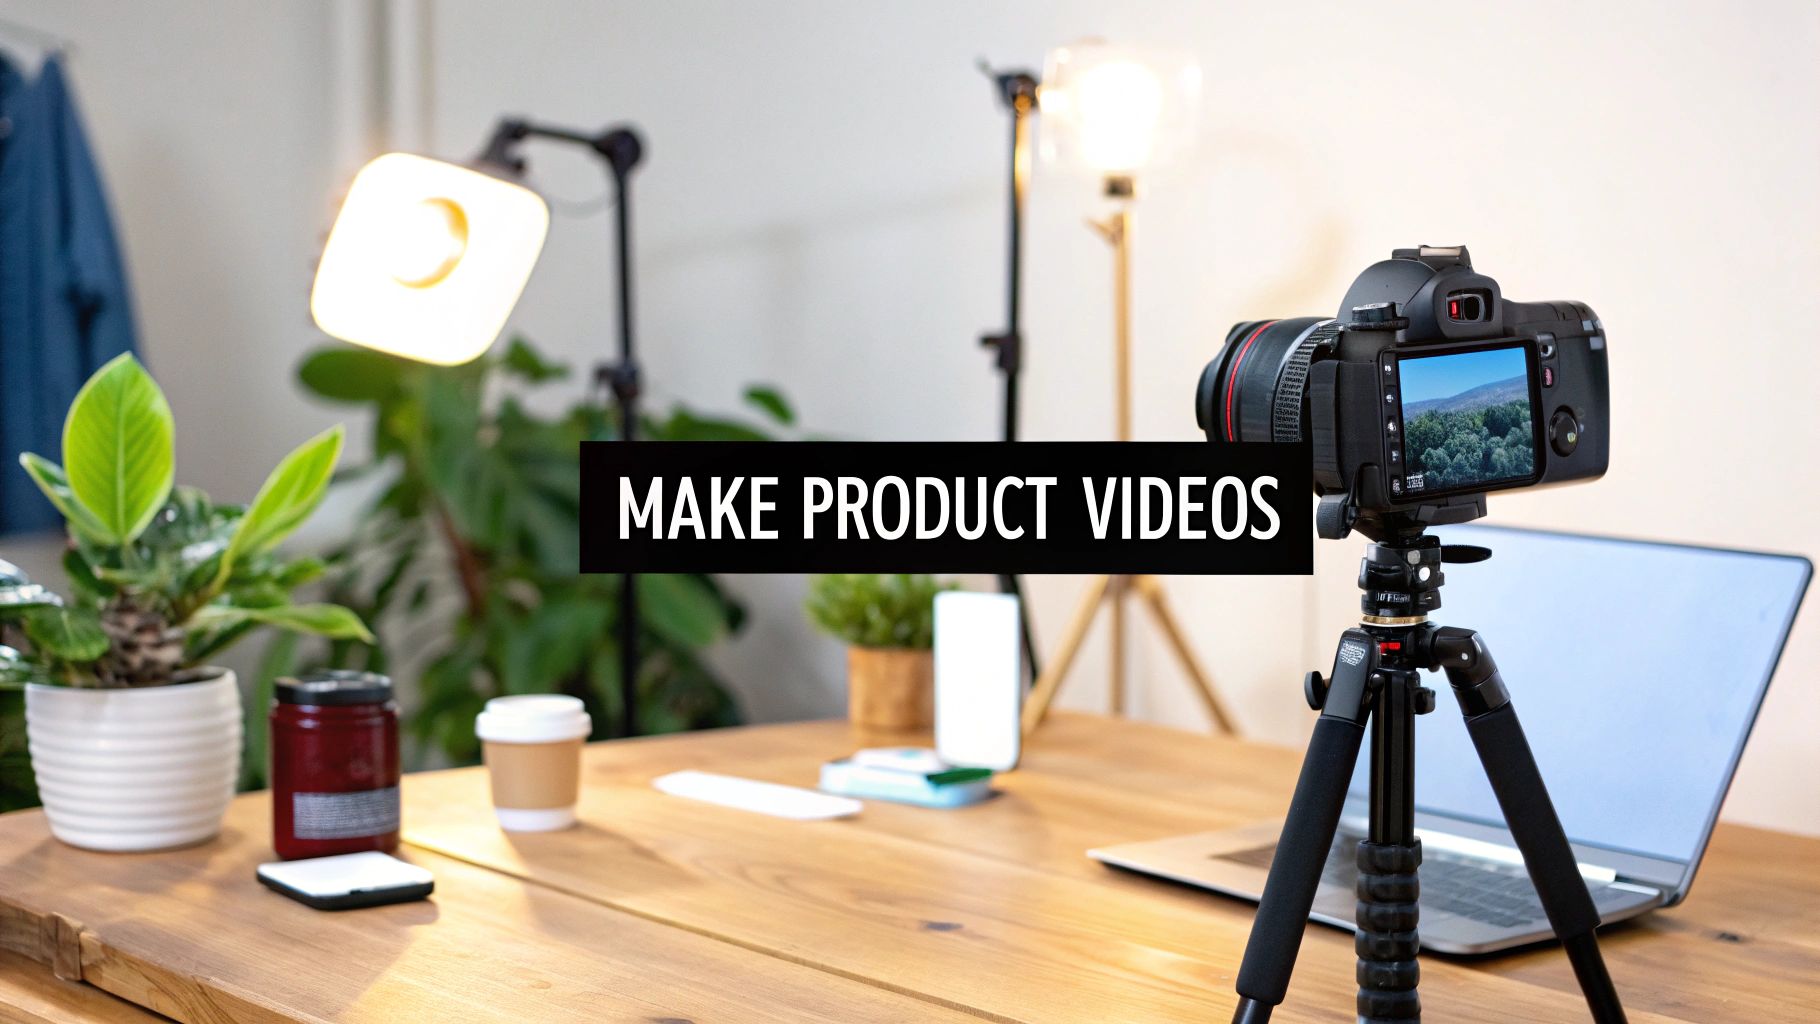
How to Make Product Videos That Sell
Learn how to make product videos that boost engagement and sales. This guide covers planning, shooting, editing, and promoting videos that convert.
Look, you can have the fanciest camera on the market, but if you don't have a solid plan, your product video will fall flat. Before you even think about hitting "record," you need a strategic blueprint. This early work is what separates a forgettable product demo from a video that actually convinces people to buy.
Building the Blueprint for a High-Converting Video
 Jumping straight into filming without a plan is a classic mistake. It's like trying to build a house without architectural drawings—you're just asking for a shaky foundation. This pre-production phase is where the magic really happens. It’s less about the gear and more about getting inside your customer’s head.
The entire process boils down to one simple question: who is this for?
Seriously, defining your ideal customer is the most critical step you'll take. I'm not just talking about basic demographics. You need to dig into their psychographics—what are their goals, their biggest challenges, and the daily frustrations that keep them up at night?
For instance, if you're selling a project management app, your audience isn't just "small business owners." It's Sarah, a freelance graphic designer drowning in client revision emails and terrified of missing another deadline. When you understand Sarah's specific pain points, you can create a video that feels like it’s speaking directly to her. If you're struggling with this, our guide on how to create buyer personas is a great place to start.
From Features to Benefits
Once you know exactly who you're talking to, you can stop listing features and start highlighting benefits. This is a game-changer. Customers don't care about the technical specs; they care about what your product can do for them.
A feature is what your product does. A benefit is how it makes your customer's life better.
Let's stick with our project management app for Sarah:
- Feature: A real-time collaboration dashboard.
- Benefit: No more confusing email chains. Get instant client feedback, finish projects faster, and finally have the time to take on more clients. See the difference?
This benefit-first mindset should drive your entire script. You’re not just showing off your product; you’re telling a relatable story about transformation.
Your script isn't a technical manual—it's a story. Frame your product as the hero that helps your customer conquer their biggest challenge. That’s far more compelling than a boring list of features.
Scripting for Visual Storytelling
With your audience and benefits nailed down, writing the script becomes so much easier. A solid product video script has a clear beginning, middle, and end. You want to hook them with a problem they recognize, introduce your product as the clear solution, and then close with a strong call to action (CTA) that tells them exactly what to do next.
Remember to write for the ear. Use conversational language, and always read your script out loud. You'll immediately catch any clunky phrases that look fine on paper but sound weird when spoken. This is where a tool like ViewPrinter’s AI writer can be a huge help, generating scripts that sound natural and authentic.
Structuring Your Shoot with a Shot List
Finally, a storyboard or a simple shot list is your roadmap for the actual shoot. This document outlines every single shot you need, including the camera angle, shot type (like a wide shot or a close-up), and any specific action that needs to happen.
This simple plan prevents you from forgetting that one crucial shot and saves a ton of time and stress on filming day. For instance, your list might specify a close-up of a user tapping a key button in your app, immediately followed by a wider shot showing their look of relief.
Before you start filming, use this checklist to make sure all your bases are covered. It’s a simple way to stay organized and ensure nothing slips through the cracks.
Essential Product Video Planning Checklist
| Planning Stage | Key Objective | Example Action | | :--- | :--- | :--- | | Audience Definition | Identify your ideal customer. | Create a detailed buyer persona, including pain points and goals. | | Benefit Mapping | Translate features into solutions. | List 3 key features and their corresponding customer benefits. | | Core Message | Define the one thing you want viewers to remember. | Write a one-sentence summary of your video's main point. | | Scripting | Create a compelling narrative. | Draft a script with a hook, a solution, and a clear call to action. | | Shot List/Storyboard | Visualize every scene. | Outline each shot, including angle, type, and on-screen action. |
This might seem like a lot of prep work, but trust me, it’s what sets successful videos apart.
The video marketing world is incredibly competitive. As of 2025, a staggering 89% of companies are using video, and standing out is harder than ever. For most brands, the biggest challenge isn't the budget—it's simply not knowing where to begin. A detailed pre-production plan gives you a clear path forward, ensuring you create a video that not only looks professional but actually drives results.
Ready to shoot? Let's get your set looking like a pro studio, even if it's just a corner of your office.
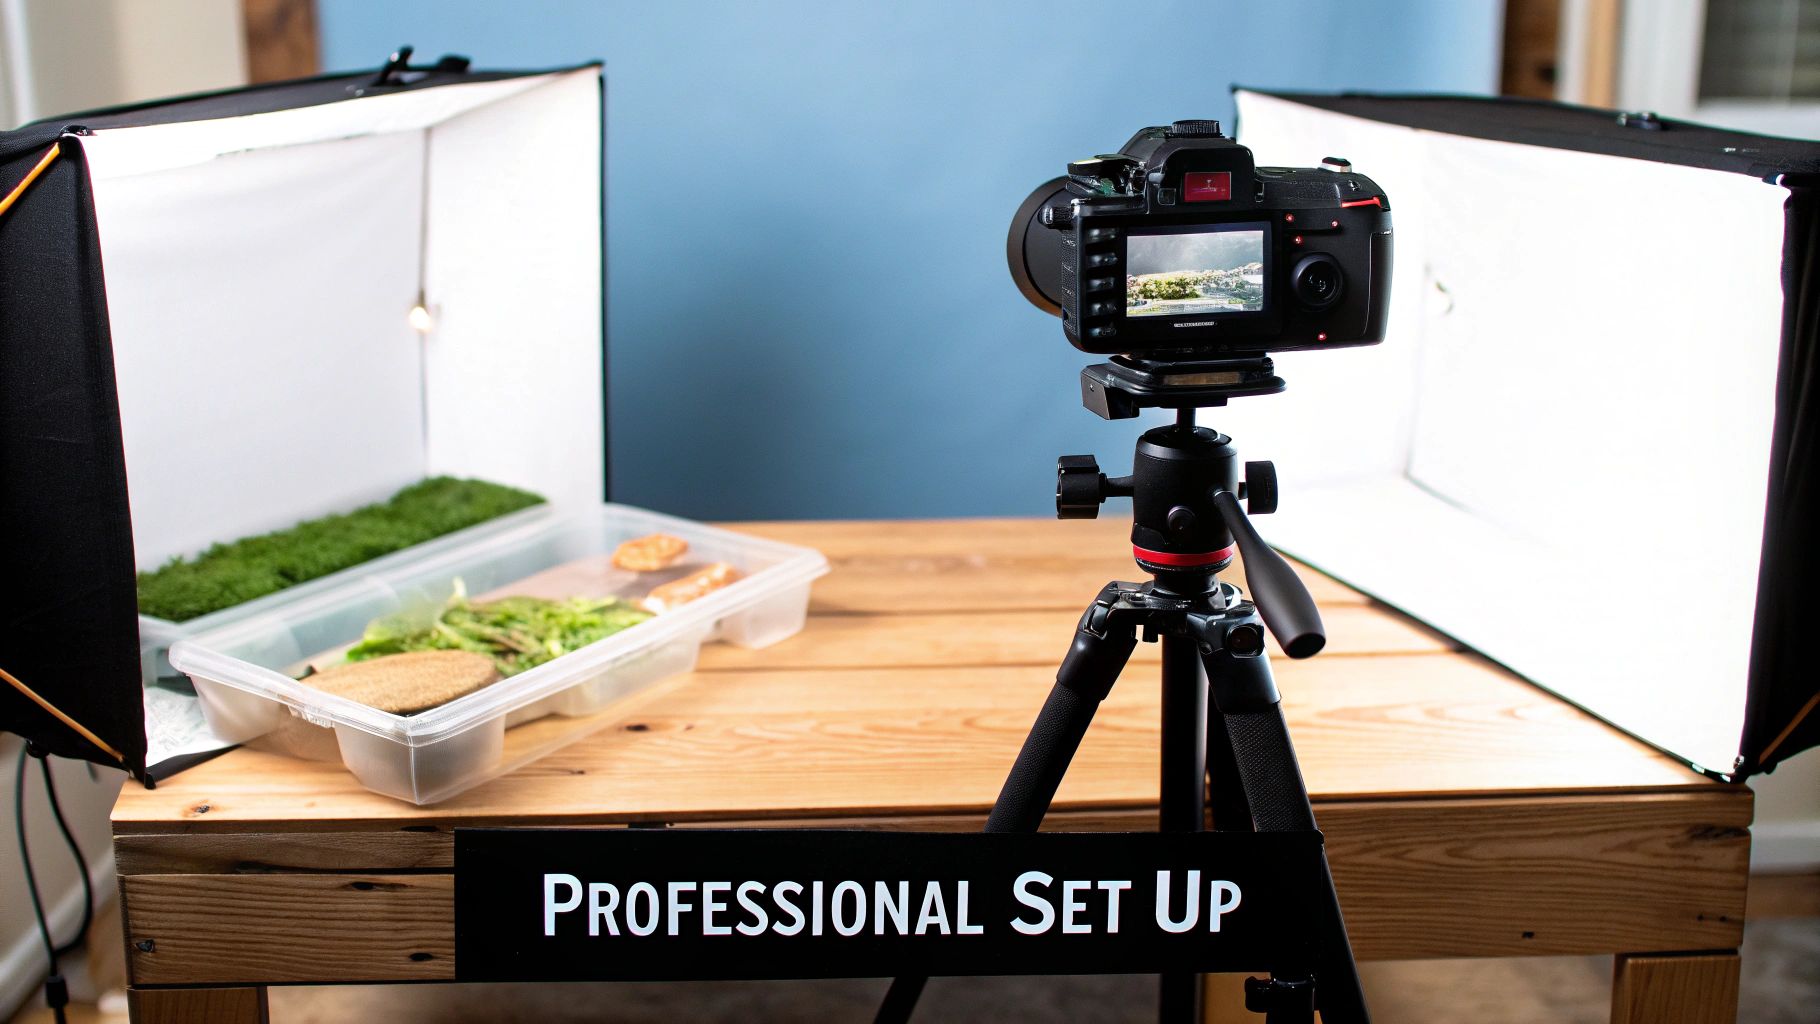
You don’t need a Hollywood budget to make your product videos look incredible. Seriously. The secret isn't in some thousand-dollar camera; it's in a well-thought-out setup that puts your product in the best possible light—literally. The gear you already have, whether it’s your iPhone or an old DSLR, is more than capable of capturing amazing footage.
The goal here is simple: make your product the undeniable star of the show. That means controlling every element around it, from the light hitting its surface to the background it sits against. Getting these foundational details right is what separates amateur footage from content that actually builds trust and makes people want to buy.
Master Your Lighting
Lighting is everything. I mean it. It's the single most important part of video production. Bad lighting can make a top-of-the-line camera look grainy and cheap, while great lighting can make a smartphone shot look like a million bucks. It creates depth, highlights key details, and just sets a professional tone.
The industry gold standard is the three-point lighting technique, and it’s way easier than it sounds. It just uses three light sources to shape your product and kill any harsh, ugly shadows.
- Key Light: This is your main, brightest light. Position it at a 45-degree angle to one side of the camera. It’s doing most of the work illuminating your product.
- Fill Light: Place this one on the opposite side of the key light. It should be less intense. Its only job is to soften—or "fill in"—the shadows created by the key light so they aren't so dramatic.
- Backlight: This one goes behind and slightly above your product, separating it from the background. It creates a subtle "rim" of light that gives your product a crisp, three-dimensional look.
And no, you don't need to buy expensive studio lights. Use a lamp you own, grab a couple of cheap LED panels online, or just use a big window as your key light. A simple white foam board from a craft store can bounce that light back and act as a perfect fill light.
Choose Backgrounds That Don't Distract
Your background should complement your product, not compete with it. If your background is busy or cluttered, you're pulling the viewer's focus away from the one thing you're trying to sell.
For a clean, modern vibe, you can't go wrong with a seamless paper backdrop in white, gray, or black. It's cheap, effective, and makes your product pop. If your brand has a more rustic or lifestyle feel, a nice wooden table or a styled shelf can work great, but keep it simple and uncluttered.
The best background is one that feels intentional but is almost invisible. It supports the story you're telling without stealing the spotlight. When in doubt, a simple, clean setting always wins.
Why Crystal-Clear Audio Is Non-Negotiable
This is a big one. People are surprisingly forgiving of slightly imperfect video, but they have zero tolerance for bad audio. If your audience can't hear you clearly, they're gone. Instantly. The microphone built into your phone or camera is designed to pick up everything, which means it captures all that distracting room echo and background hum.
Investing in a simple external microphone is one of the biggest upgrades you can make to your video quality.
Here are a few solid options:
- Lavalier Mic (Lapel Mic): That tiny mic that clips onto your shirt. It's perfect for capturing your voice clearly when you're on camera.
- Shotgun Mic: This mounts on top of your camera and is super directional, meaning it mostly picks up whatever you're pointing the camera at.
- USB Mic: If you're doing voiceovers, this is your best friend. It plugs right into your computer and delivers that rich, podcast-quality sound from a stationary spot.
Nail these three things—lighting, background, and audio—and you'll do more for your video quality than any fancy camera ever could. This is the foundation for an effective video that actually gets results.
Filming Your Product to Capture Attention
With your set ready and your storyboard in hand, it's time to actually roll the camera. This is where all that careful planning comes to life, turning your ideas into a real, dynamic visual story. This isn't just about pointing a camera and pressing record; it’s about strategically guiding your viewer’s eye to showcase your product in the most compelling way possible.
Let's be honest, a single, static shot is the fastest way to get someone to scroll away. To keep people hooked, you need variety. Think like a filmmaker and use a mix of shots to create a visual rhythm that holds their attention from beginning to end.
Build a Visual Story with Different Shots
Your shot list is your roadmap, but don't be afraid to experiment a little on set. The real magic happens when you combine different perspectives to tell a complete story. A great product video feels seamless because it blends several types of shots to control the focus and the flow of information.
Here are the core shots you absolutely need to master:
- Wide Shot: This is your opening scene. It shows the product in its natural environment, giving viewers immediate context. Think of a shot of someone at their desk, comfortably using your ergonomic keyboard.
- Medium Shot: Now we're getting a little closer. This shot typically shows the product in action from about the waist up. It’s perfect for demonstrating how a person actually interacts with your product.
- Close-Up Shot: Time to zoom in on the details. This is where you highlight specific features, a well-designed button, or a unique texture. You're showing off the quality and craftsmanship here.
- Macro Shot: This is the extreme close-up. It reveals intricate details the naked eye might otherwise miss, like the premium stitching on leather or the fine print on a label. This kind of shot builds a ton of trust and perceived value.
Mixing these up is what creates a professional video. You could start wide to show someone struggling with their old, clunky coffee maker, then cut to a medium shot of them unboxing your sleek new machine, and finally use a few quick close-ups to highlight its simple, one-touch operation.
Add a Professional Touch with Simple Camera Movements
Movement is what separates amateur videos from polished, professional content. You don’t need a Hollywood budget for a crane or a dolly, either. Subtle, controlled movements can make a world of difference. A simple camera slider, which you can get for a pretty decent price online, adds that smooth, cinematic motion that looks incredible.
Here are two easy but super-effective movements to try:
- The Pan: This is just a slow horizontal movement, left to right or right to left. It’s a classic way to reveal a product or scan across a collection.
- The Slide: This is where the entire camera moves smoothly sideways. It adds a clean, high-end feel that’s perfect for introducing your product or gliding across its key features.
When you combine these movements with your different shot types, you get a much richer viewing experience. Capturing this kind of dynamic footage is how you create compelling B-roll—the extra shots that add context and visual interest to your main story. To see what I mean, check out our collection of effective b-roll examples.
Keep your movements slow and steady. The goal is to add a touch of elegance, not create a dizzying action sequence. A gentle, controlled slide is always more effective than a quick, jerky pan.
Demonstrate Your Product with Confidence
When you're the one on camera showing off the product, your actions need to be clear and deliberate. Your hands are the stars of the show here, so make sure their movements are smooth and easy to follow.
It really helps to practice handling the product a few times before you start filming. This way, your actions will look natural and confident, not fumbling or uncertain. This is where all that meticulous planning pays off—by following your shot list and using these creative techniques, you’ll walk away with all the footage you need to create a video that truly sells.
Editing Your Video with AI-Powered Efficiency
You’ve captured all your shots, and the footage is in the can. Now comes the magic: the edit. This is where your story truly comes to life. For many, post-production feels like the most daunting part of creating product videos, but it's also where you get to inject personality, polish, and professionalism.
The great news? You no longer have to chain yourself to a desk for days, painstakingly trimming clips and tweaking audio. Modern editing, especially with AI in the mix, has completely changed the game. What once took a full day can now be knocked out in a lunch break.
Assembling Your Story on the Timeline
First things first: get your best takes onto the editing timeline. Think of it like putting together a puzzle. You’ll arrange your wide shots, medium shots, and close-ups in the sequence you mapped out in your storyboard. This is your rough cut—don’t get bogged down in perfection just yet.
The main goal here is to build the narrative. Start with a strong hook, introduce the problem your product solves, show it in action, and close with a compelling call to action. Trim the dead air at the beginning and end of each clip.
Once the basic story flows, you can start refining. This is where AI-powered editors like ViewPrinter really start to flex their muscles. Instead of manually scrubbing through footage to find the best moments, our AI can analyze your clips and suggest the most visually engaging segments. It's a massive time-saver.
Automating the Tedious Tasks
Let's be honest, the most soul-crushing part of editing is the repetitive stuff. Manually cutting out every "um" and "ah," creating subtitles from scratch, or endlessly searching for the right background music? It’s a grind. This is where AI isn't just helpful—it’s a game-changer.
Here's how AI handles the grunt work for you:
- Silence Removal: Instantly find and snip out all the awkward pauses and silent gaps, giving your video a much tighter, more professional pace.
- Automatic Subtitles: With a single click, AI generates accurate captions. This is non-negotiable, since a huge chunk of social media videos are watched with the sound off.
- AI Clip Suggestions: ViewPrinter can even analyze your raw footage and pinpoint the most compelling moments, helping you build a dynamic sequence without having to watch everything twice.
This infographic really drives home the difference between a manual workflow and an AI-assisted one.
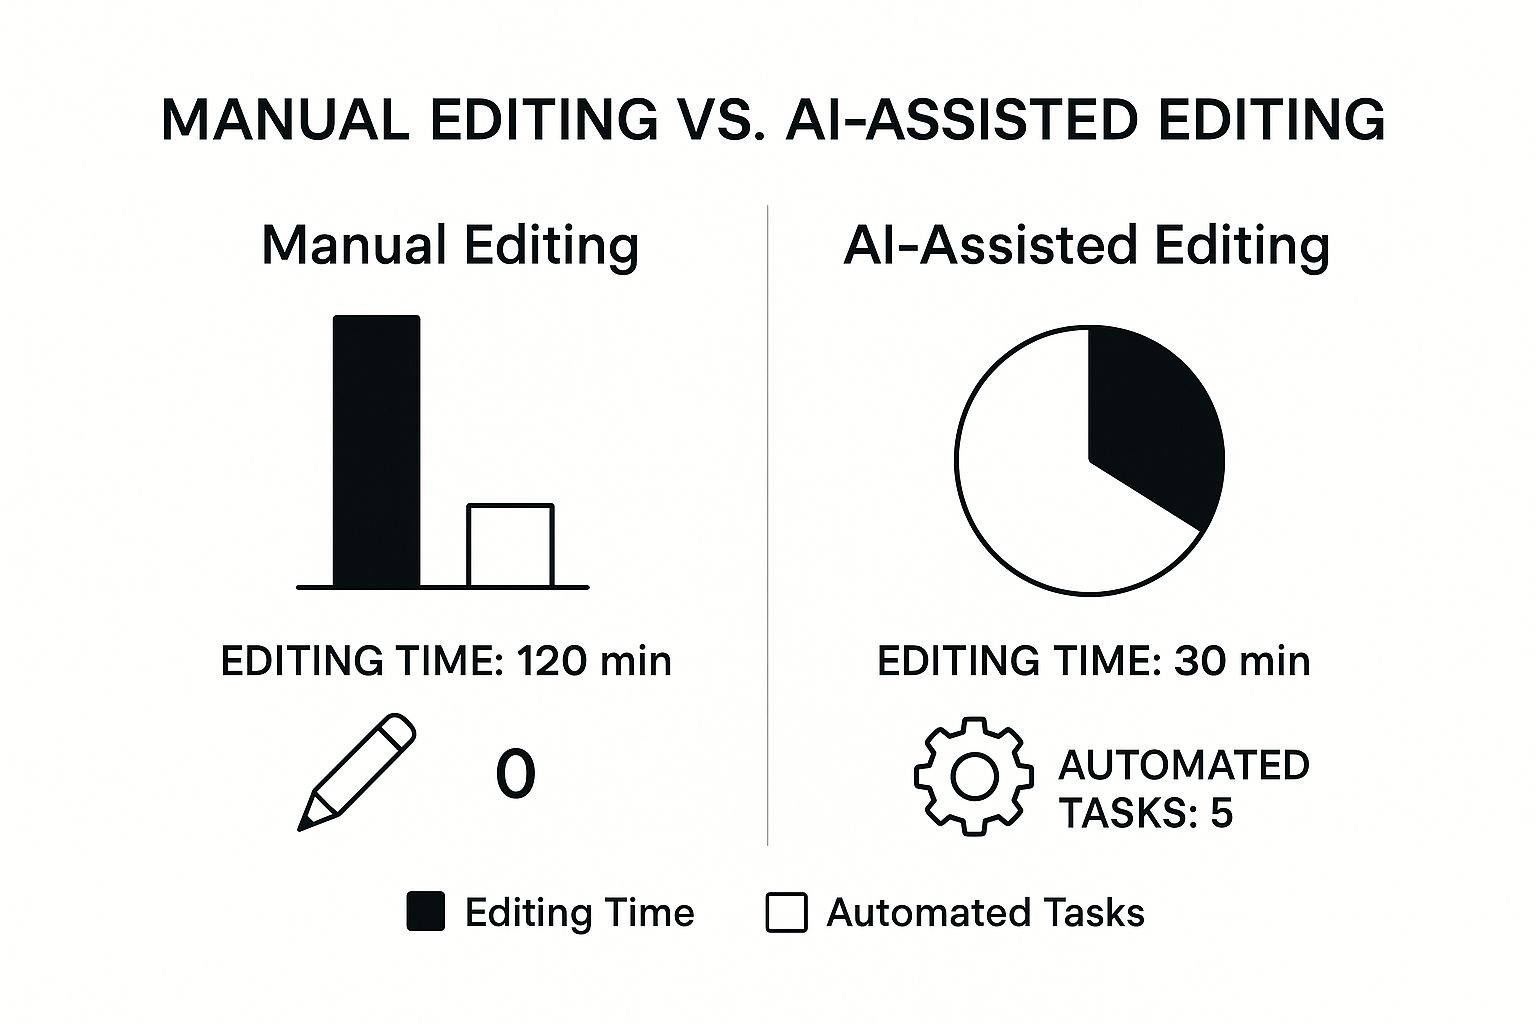
The numbers don't lie. AI can slash your editing time by up to 75%, freeing you to focus on the creative storytelling instead of the manual labor.
To really understand the shift, let’s compare the old way with the new way.
Traditional vs AI-Powered Video Editing
This table breaks down how AI tools accelerate common editing tasks and improve the final product compared to doing everything by hand.
| Editing Task | Traditional Method | AI-Powered Method | | :--- | :--- | :--- | | Clip Selection | Manually scrubbing through all footage to find the best takes. | AI analyzes and suggests the most visually engaging clips. | | Pacing | Manually trimming pauses and dead air from each clip. | One-click silence removal tightens pacing instantly. | | Subtitling | Typing out and timing captions for the entire video. | AI generates accurate, timed subtitles automatically. | | Color Correction | Manually adjusting exposure, white balance, and saturation. | AI provides one-click color correction and suggests stylistic grades. | | Music Selection | Browsing extensive libraries to find a track that fits the mood. | AI recommends royalty-free music based on the video's content and tone. |
As you can see, the AI-powered approach doesn't just save time; it often delivers a more polished and consistent result with far less effort.
Adding Polish with Color, Text, and Sound
With your story structured and the heavy lifting done, it’s time for the finishing touches. These are the details that elevate a good video into a great one.
Color Correction and Grading This step is crucial for making your product look its absolute best. Color correction fixes technical issues like exposure or white balance. Color grading is the creative part where you apply a specific "vibe" to evoke a mood.
Think of it this way: color correction fixes problems, while color grading adds personality. A warm, sunny grade might be perfect for a lifestyle brand, while a cool, sleek look could suit a new tech gadget.
Text Overlays and Graphics Use text to hammer home key benefits or your call to action. Keep it short, bold, and easy to read. A bit of animation can add a dynamic touch, but don't go overboard—the product is always the star of the show. If you're looking for the right tools, check out our guide on the best video editing software for social media.
Music and Sound Design The right background music can completely change the emotional tone. Choose a track that matches your brand’s energy. Don't forget sound effects! A subtle "click" when a button is pressed or a "swoosh" for a transition can make the product feel more tangible and satisfying.
The digital world is noisy. By 2025, video is projected to make up 82% of all global internet traffic. In this crowded space, 54% of marketers are already using AI to create videos more efficiently. This isn't just about speed; it's about producing higher-quality, more engaging content that can actually compete for attention.
By embracing these AI-powered editing techniques, you can produce polished, high-converting product videos at a scale that was once impossible. That’s a serious advantage.
Promoting Your Video to Drive Maximum Reach

So you’ve created a stunning product video. That’s a massive win, but the journey isn't over when the final render is complete. A fantastic video sitting on your hard drive has an ROI of exactly zero.
The real work starts now: getting that asset in front of the right eyeballs. Your goal is to turn a creative piece into a hard-working marketing machine that consistently attracts, engages, and converts viewers into loyal customers.
This final phase is all about strategic distribution. A scattergun approach just won't cut it. You need a deliberate plan to place your video where your target audience already spends their time, making sure it’s optimized for each platform to feel native and perform well.
Your Website Is Your Strongest Asset
Your own website is the most valuable real estate you have. It’s a controlled environment where your video can shine without the distraction of competing content. Embedding your video directly on your product pages is non-negotiable—it can increase conversion rates by as much as 80%.
Place your video prominently, ideally "above the fold" so visitors see it without having to scroll. This placement gives immediate context and answers questions visually, which is far more powerful than text alone.
Think about these key placements, too:
- Homepage: A high-impact brand or product video here can quickly communicate your value proposition to new visitors.
- Landing Pages: For targeted campaigns, a video can dramatically improve lead generation and sign-ups.
- Blog Posts: Use your product video to support relevant content, providing a dynamic example within an educational article.
Optimizing for Search and Social Platforms
While your website is home base, social media and YouTube are where you'll find new audiences. But you can't just upload the same file everywhere and expect results. Each platform has its own language, audience expectations, and technical quirks.
YouTube Video SEO
Think of YouTube as the world's second-largest search engine. Getting your video optimized here is essential for long-term discoverability.
- Keyword-Rich Titles: Your title should be compelling and include your primary keywords. Instead of "New Blender Demo," try "How to Make the Perfect Smoothie with the [Product Name] Blender."
- Detailed Descriptions: Use the description to explain what the video is about. Include relevant keywords, links back to your product page, and even a full transcript.
- Engaging Thumbnails: Create a custom thumbnail that is bright, clear, and teases the video's content. A great thumbnail is often the deciding factor in whether someone clicks.
Tailoring for Social Media
On platforms like Instagram and TikTok, you have only seconds to grab attention.
- Go Vertical: The days of horizontal video dominating social are over. In 2025, vertical HD video uploads surged by 51%, driven by mobile-first viewing habits. Always create a 9:16 version of your video for these platforms.
- Keep It Short and Punchy: Edit your main video down to a 15-30 second, high-impact clip that gets straight to the point.
- Captions are King: Over 85% of videos on Facebook are watched without sound. Use bold, easy-to-read captions to ensure your message gets across, even on mute. ViewPrinter’s automatic subtitle generator makes this incredibly fast.
Your goal isn't just to post your video; it's to adapt it. A single product video can be sliced into a YouTube tutorial, an Instagram Reel, a TikTok ad, and a series of GIFs for email. Maximize your effort by thinking multi-format from the start.
To extend the life and reach of your product videos, consider applying powerful content repurposing strategies, transforming your video content into various formats for different platforms.
Building a Comprehensive Distribution Plan
Beyond just posting, a proactive distribution plan ensures your video reaches its full potential. This means mixing organic and paid strategies to create a constant stream of viewers.
Leverage Your Email List
Your email subscribers are a highly engaged audience. Announce your new video with a dedicated email campaign. Just using the word "video" in an email subject line has been shown to boost open rates by 19%.
Amplify with Paid Ads
Targeted ad campaigns on platforms like Meta (Facebook and Instagram) and TikTok allow you to get your video in front of your ideal customer profile with surgical precision. Start with a small budget to test different audiences and creative variations, then scale what works.
The investment in making product videos continues to show a strong return. A recent study found that 90% of marketers report a good ROI from their video efforts, which directly correlates with an 87% increase in both lead generation and sales. These figures prove that a well-made and well-promoted video is one of the most effective tools for growth.
By pairing a high-quality video with a thoughtful, multi-channel promotion strategy, you create a powerful asset that works for your business around the clock—driving awareness and sales long after you hit "publish."
Common Questions About Making Product Videos
Jumping into video production can feel like a massive undertaking, and it's totally normal to have a few questions swirling around. From budget anxieties to tech headaches, nearly everyone has the same worries when they decide to make product videos. Let's cut through the noise and tackle those concerns.
The first question is almost always about money: "How much is this really going to cost?" The honest answer? It depends, but it's probably way less than you're imagining. You don't need a Hollywood budget to make a video that actually sells your product.
Seriously, the 4K camera in your pocket—your smartphone—is more than powerful enough. Add some good lighting, which you can get from a couple of cheap LED panels or even just a well-lit window, and a basic lavalier mic for clear audio. That's it. The real investment here is your time, particularly in planning and editing.
How Long Should My Product Video Be?
This is a big one, and the answer is all about where people will see it. Attention spans are brutally short, so you have to get to the good stuff—fast.
Here’s a quick cheat sheet based on my experience:
- Social Media Ads (TikTok, Instagram Reels): Keep it tight, 15-30 seconds. These need to be punchy, eye-catching, and deliver your main point almost instantly.
- Product Page Videos: You have a bit more breathing room here, maybe 60-90 seconds. The viewer is already interested, so you can take a moment to really show off key features and benefits.
- YouTube Explainers or Tutorials: For these deeper dives, 2-5 minutes works well. You have the space to provide real value, solve a problem, and build some serious trust with your audience.
The golden rule is simple: make your video exactly as long as it needs to be to tell the story, and not one second longer. If a shot doesn't serve a purpose, it gets the chop.
Do I Need to Be an Expert Editor?
Not anymore. This used to be the single biggest roadblock for so many businesses. Traditional editing software has a notoriously steep learning curve, often demanding hours of tutorials just to figure out the basics.
Thankfully, those days are over. AI-powered platforms have completely changed the game, making professional-quality editing something anyone can do. Tools like ViewPrinter can automate the most tedious parts of the job. Think about it: generating accurate subtitles with a single click, automatically trimming awkward silences, or even getting AI-powered suggestions for the most engaging clips from your raw footage.
This shift lets you stop being a technician and start being a storyteller. Instead of wrestling with confusing software, you can focus all your energy on crafting a message that connects with your audience and drives sales. You no longer need to be a video wizard to get a polished final cut that looks like it was made by a pro. The tools are here to do the heavy lifting for you.
Ready to create stunning product videos without the steep learning curve? With ViewPrinter, you can use AI to generate scripts, edit footage in minutes, and schedule content across all your social platforms from one place. Start creating with ViewPrinter today and see how simple high-impact video can be.