The Best Video Editing Software for Beginners A Complete Guide
Discover the best video editing software for beginners in our detailed guide. We compare features, workflows, and use cases to help you start creating.
If you're just getting started, the best video editing software is all about finding that sweet spot between easy-to-use controls and powerful features. Think browser-based tools like ViewPrinter for no-fuss editing, mobile apps like CapCut for quick social media clips, or approachable desktop software like Filmora when you want a bit more control. The goal is to find a tool with a clean interface that won't make you want to pull your hair out.
How To Choose Your First Video Editor
Picking your first video editor can feel overwhelming. You're hit with a wall of technical jargon and endless feature lists, and it's easy to get lost. But here's the secret: the "best" software isn't the one with the most buttons. It's the one that fits what you need to do, helping you create great-looking videos without the headache.
Making the right choice really boils down to just a few key things. This decision tree is a great way to visualize it—think about your project goals, your computer's power, and your budget to point you in the right direction.
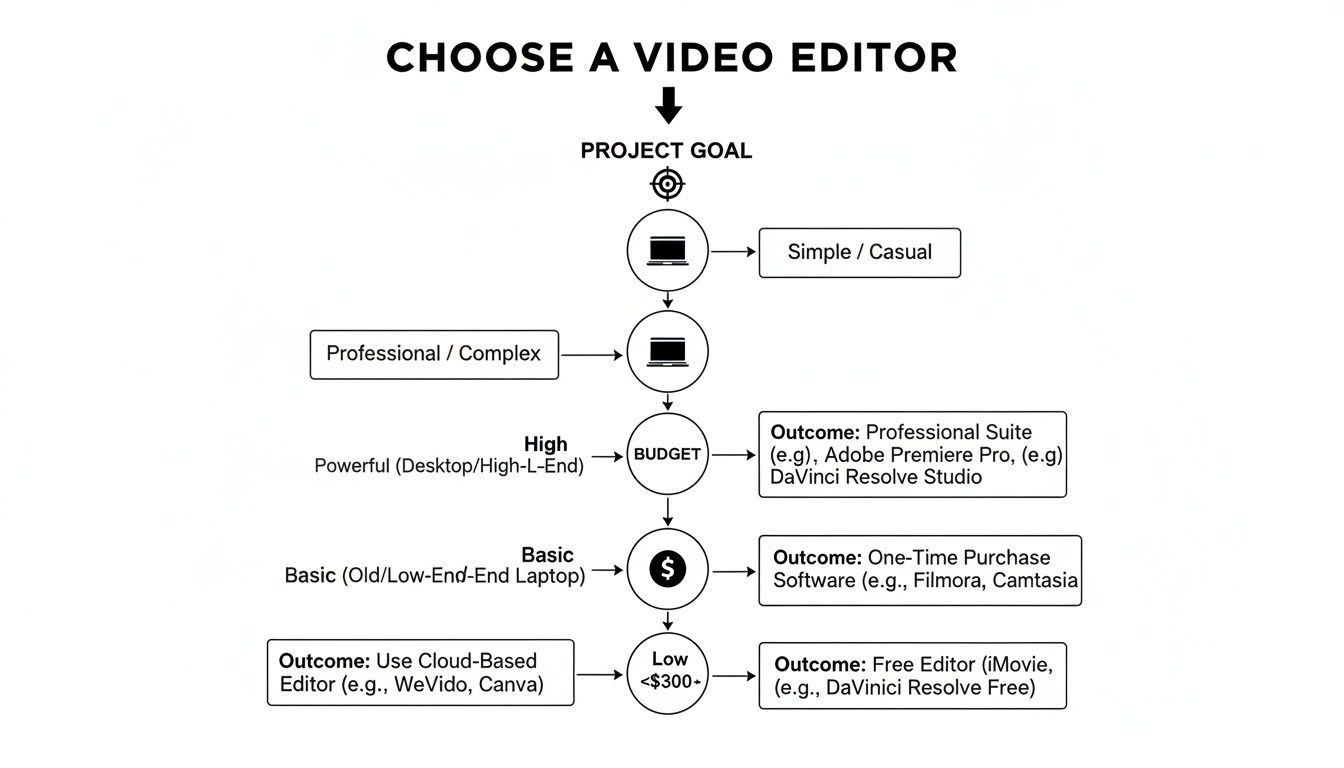
As you can see, there’s no single answer. The right editor for you is entirely situational, depending on your resources and what you’re trying to create.
Core Evaluation Criteria
To make a smart choice, you need to focus on the practical stuff that actually impacts your day-to-day experience. An overly complicated tool will just kill your motivation before you even get started.
Instead of getting bogged down comparing every single feature, measure your options against these fundamental benchmarks. The right editor should feel like a creative partner, not a technical puzzle.
The best software for a beginner is one that gives you a clear path from start to finish. Things like guided edits, drag-and-drop timelines, and ready-made templates aren't just nice-to-haves; they're what build your confidence and help you learn faster.
Here's a quick rundown of the essential factors to consider as you weigh your options.
Key Decision Factors for Beginner Video Editors
| Evaluation Criteria | Why It Matters for Beginners | What to Look For | | :--- | :--- | :--- | | User Interface (UI) | A clean, logical layout means you spend less time hunting for tools and more time actually creating. | Simple drag-and-drop functionality, a clutter-free timeline, and icons that make sense at a glance. | | AI & Automation | Tools like auto-captions, scene detection, or smart trimming can save you hours of boring, repetitive work. | Features that automate the tedious stuff, suggest edits, or help generate elements for your video. | | Templates & Assets | Starting from a pre-built template or having access to stock music and clips gives your projects a professional polish from day one. | A good library of modern, stylish templates and integrated, royalty-free media. | | Pricing & Plans | You need to know what you're getting into financially. A good free trial or a robust free version is perfect for learning the ropes. | A free plan that doesn't slap a watermark on your video, or a subscription that fits your budget without surprises. |
While this table covers the essentials for getting started, some of you might already be thinking about what's next. If you plan to scale up, it's worth exploring more advanced video editing software options down the road. But for now, sticking to these core factors will ensure you pick a tool that helps you grow, not one that holds you back.
Diving Into the Three Kinds of Video Editors
Not all video editors are built the same, and the tool you pick will absolutely shape how you create. The world of video editing software really breaks down into three main camps. Each one serves a different kind of creator, solves a different problem, and comes with its own quirks.
Figuring out these differences is your first step. Forget about brand names for a second and think bigger: which category actually fits your goals, your computer, and the videos you dream of making?
The Powerhouse: Traditional Desktop Software (NLEs)
When you picture a pro editor hunched over a glowing screen, you're thinking of a Non-Linear Editor (NLE). These are the heavy-duty, feature-packed programs you install on your Mac or PC—the industry standard for everything from polished YouTube videos to Hollywood blockbusters.
- Total Creative Control: Desktop NLEs give you the keys to the kingdom. You get complex multi-track timelines, pro-level color grading, fine-tuned audio mixing, and support for just about any file type or plugin you can imagine.
- Needs a Beefy Machine: The biggest catch is the hardware demand. You’ll need a computer with a solid graphics card, a good chunk of RAM, and a fast processor to avoid the headache of lag and endless rendering times.
- The Learning Curve is Real: While many have gotten friendlier over the years, the sheer volume of buttons, menus, and features can feel like climbing a mountain for a total beginner.
By 2024–2025, the professional market had really settled on a few big players. Adobe Premiere Pro, Apple Final Cut Pro, and Blackmagic Design’s DaVinci Resolve locked up about three-quarters of the paid desktop market. For a newcomer, that consolidation has a practical upside: picking one of the big dogs means more YouTube tutorials, more templates, and better compatibility. You can discover more insights about video editing market share and see how it helps new creators get up to speed faster.
The On-the-Go Editor: Convenient Mobile Apps
With the explosion of TikTok and Instagram Reels, mobile editing apps have become essential. These apps are all about speed and convenience, letting you create content right on the phone or tablet you used to film it.
Their magic is in their immediacy. You can literally shoot, edit, and upload a video to social media in a matter of minutes. This makes them unbeatable for vlogging, capturing spontaneous moments, and keeping your social feeds fresh.
Mobile apps are a fantastic training ground. You learn the fundamentals of storytelling and pacing without getting tripped up by a million technical settings. The touch-screen interface just feels natural for trimming clips and dropping in effects.
But that convenience has its trade-offs. You're giving up precise control, working on a tiny screen, and missing out on the advanced tools you’d find on a desktop. They're built for short, punchy content, not a feature film.
The Smart Middle-Ground: Modern Browser-Based Platforms
A third category has emerged that hits the sweet spot for a lot of new creators: browser-based editors. These platforms run completely in your web browser. No installs, no updates—just log in and go from any computer with an internet connection.
This approach offers some huge wins, especially for beginners:
- No Fancy Computer Needed: All the heavy lifting—like rendering and processing—happens on the company’s powerful cloud servers. That means you can create smooth, professional-looking videos even on a basic laptop.
- Work From Anywhere: Your projects are saved online, so you can start an edit at home and finish it at a friend's house. Many platforms are also built for easy team collaboration.
- AI Superpowers: These tools are often the first to get cool AI features. For anyone curious about how to create video with AI, browser platforms offer things like one-click captions, automatic scene detection, and smart content suggestions that can seriously slash your editing time.
Browser-based editors like ViewPrinter are designed from the ground up to tear down the old barriers, giving you a straightforward path to high-quality video without the technical headaches.
Comparing Essential Features For New Editors
Choosing your first video editor isn't just about picking a product; it’s about finding a workflow that clicks with how you think. The shiniest features on a marketing page don't always lead to a great editing experience. The real story comes out when you see how different types of software handle the day-to-day tasks.
So, instead of just a checklist, let's walk through a few real-world scenarios. This will give you a much better feel for which toolset is the right fit for the videos you actually want to make.
User Interface And Workflow Simplicity
The first thing you'll ever notice is the user interface (UI). This is where most beginners either get hooked or get frustrated and quit. A cluttered, confusing workspace is an instant creativity killer, while a clean, intuitive layout feels like an invitation to start creating.
- Mobile Apps: These are built for one thing: speed. They use a super visual, touch-based interface where you’re just tapping and dragging clips. The whole process is linear and simple, which is perfect for banging out a quick edit on the fly.
- Desktop NLEs: These are the powerhouses. They give you a massive, customizable workspace with multi-track timelines, source monitors, and endless panels for effects and audio. This is amazing for control, but the sheer number of buttons and options can feel like staring at an airplane cockpit for the first time.
- Browser/AI Platforms: These try to find a happy medium. They often have clean, drag-and-drop timelines like you’d see on a mobile app, but in a more organized, desktop-style layout. Many, like ViewPrinter, are designed around guided workflows that walk you through the process, which removes a lot of the guesswork.
Let’s say you want to stitch together a simple 30-second promo from five video clips. On a mobile app, you’d tap to import, drag to reorder, and pinch to trim—you could be done in under a minute. On a desktop NLE like Premiere Pro, you’d first create a project, import your files into "bins," create a "sequence," and then start arranging clips on the timeline. It’s more methodical, but also more setup. A browser-based editor lets you jump right in, often letting you upload and immediately start arranging clips.
AI Tools And Automation Capabilities
AI features aren't a gimmick anymore; they're huge time-savers, especially when you're just starting out. Automation takes care of the boring, repetitive work, freeing you up to focus on telling a good story.
Imagine you filmed a 10-minute interview and need to trim it down and add captions. The difference in workflow here is night and day.
- Manual Process (Traditional Desktop NLEs): You’d have to sit and watch the entire interview, manually marking and cutting out all the pauses and mistakes. Then, you'd probably use another tool or a clunky plugin to transcribe the audio and painstakingly time out all the captions. This could easily burn an hour or more of your time.
- Automated Process (Browser/AI Platforms): You upload the video. An AI tool transcribes the whole thing in a few minutes. To make your edits, you just delete the words you don't want from the text transcript, and the video clips are automatically cut to match. Captions? Generated instantly from that same transcript. This entire workflow could be done in less than 15 minutes.
This is where modern tools give beginners a massive leg up. By automating things like finding scenes, creating captions, or even suggesting good cuts, they demolish the technical barriers that used to make video editing so intimidating.
Templates And Stock Asset Libraries
Staring at a blank timeline is tough. Templates and built-in stock media give you a professional-looking head start, which is a huge confidence booster when you're new.
But it’s the kind of assets that really matters. The library needs to match the style of video you want to create.
- Mobile Apps: Their libraries are full of trendy effects, filters, and sounds you hear all over TikTok and Instagram. They’re perfect for making content that feels native to those platforms. Think CapCut or FilmoraGo.
- Desktop Software: Here, templates are usually more cinematic or corporate—think polished title sequences and professional lower-thirds. Stock media is often a separate integration, like needing an Adobe Stock subscription for Premiere.
- Browser/AI Platforms: These often hit the sweet spot. Platforms like ViewPrinter build massive, royalty-free libraries of video clips, images, and music right into the editor. Their templates are typically built for a purpose, like social media ads, marketing promos, or educational content.
The choice here is all about your goal. If you're making a viral dance video, a mobile app's trendy templates are your best bet. If you're creating a polished pitch for your business, a browser platform's professional templates make more sense. Finding the best video editing software for beginners is really about matching the tool’s assets to your vision.
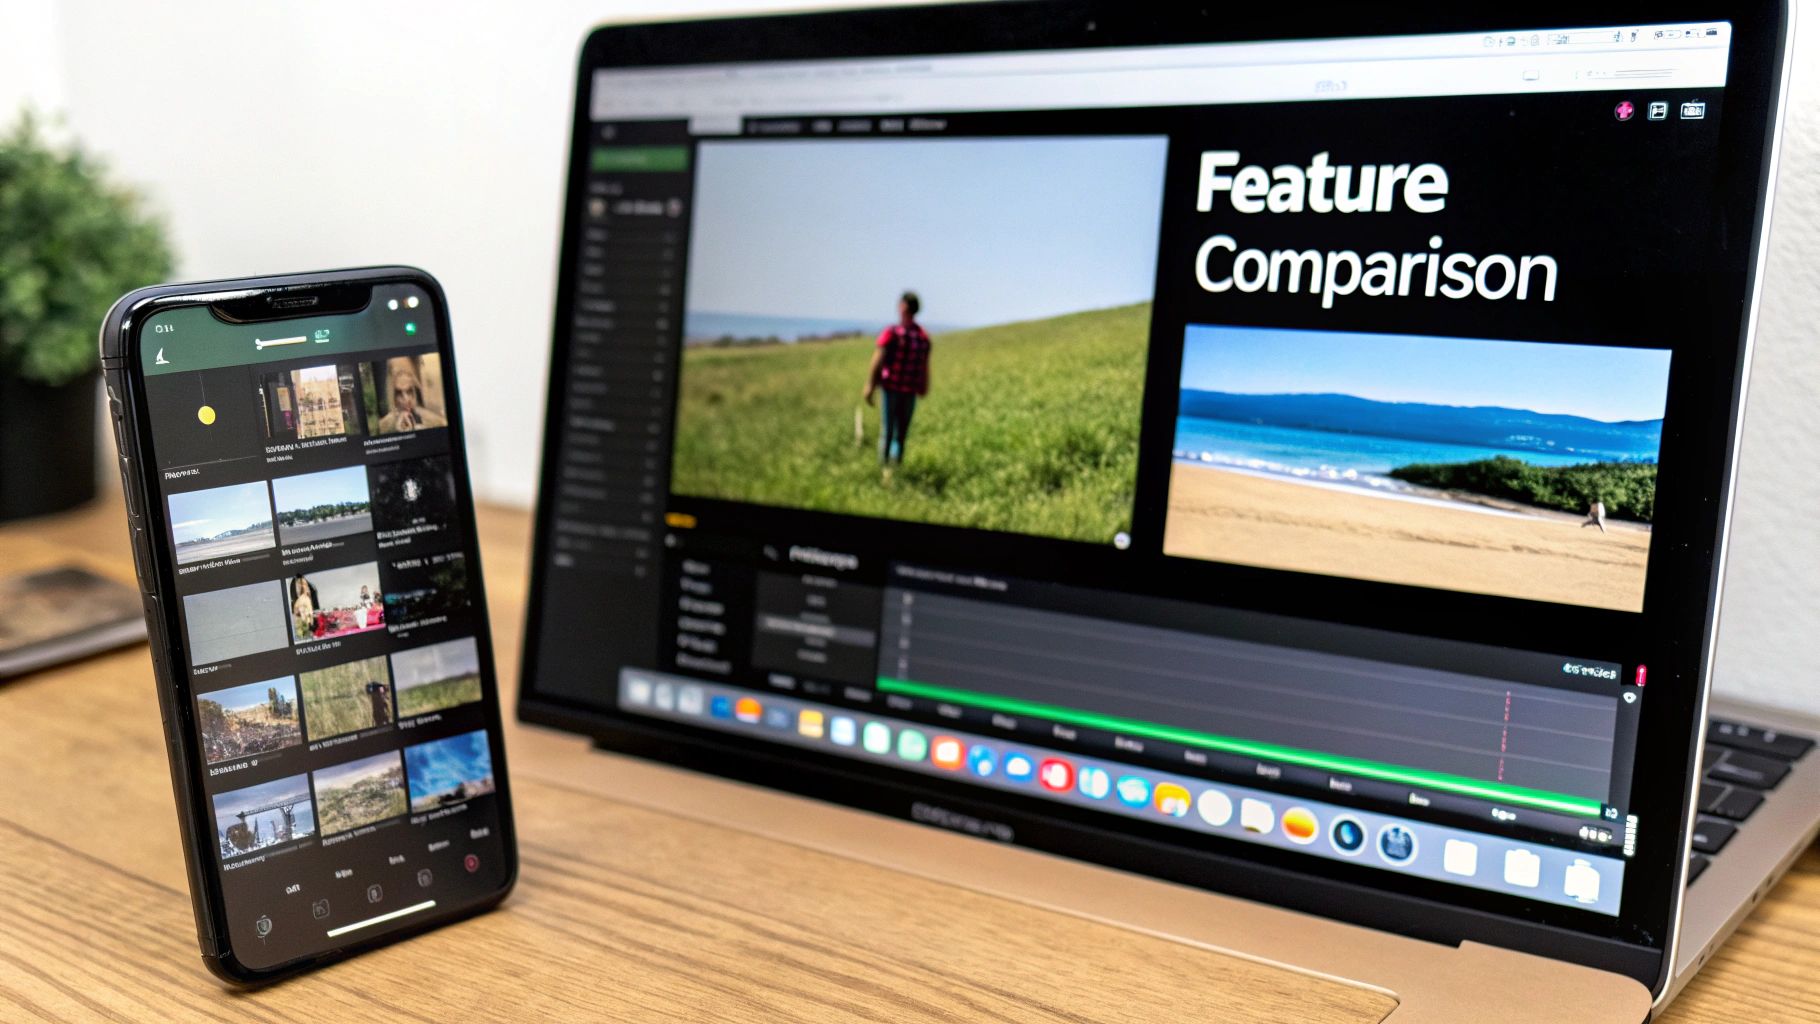
To help you see how these differences play out, here’s a quick breakdown of how each type of editor handles these core features. This isn't about which is "better," but which is a better fit for your specific needs right now.
Feature Comparison Across Editor Types for Beginners
| Feature | Desktop Software (e.g., Premiere Pro, DaVinci) | Mobile Apps (e.g., CapCut, FilmoraGo) | Browser/AI Platforms (e.g., ViewPrinter) | | :--- | :--- | :--- | :--- | | Workflow | Powerful & customizable; very steep learning curve. | Fast & linear; optimized for quick social posts. | Guided & intuitive; balances simplicity with control. | | AI Automation | Often requires plugins or completely manual processes. | Basic AI effects (e.g., background removal). | Deeply integrated for text-based editing & auto-captions. | | Templates & Assets | Professional & cinematic; often requires third-party assets. | Trend-focused; perfect for social media content. | Business & marketing-oriented; large integrated libraries. |
As you can see, there’s no single "best" option. A desktop NLE offers unparalleled power once you master it, a mobile app offers unbeatable speed for social content, and a browser/AI platform offers a guided, efficient path for creating professional-looking videos without the steep learning curve. The right tool is simply the one that removes friction and helps you get your ideas out into the world.
Picking the Right Tool for Your Video Projects
Here’s the single most important thing to remember: the “best” video editor is the one that actually fits what you’re trying to create. A tool that’s perfect for a social media influencer making 30-second clips can feel completely wrong for an aspiring YouTuber building a long-form channel.
Think about it like this—you wouldn't use a sledgehammer to hang a picture frame. Matching the software's strengths to your content goals from the start makes the whole process smoother and way more fun.
Let's break down three common types of creators. See which one sounds most like you, and we'll point you toward the right kind of tool.
The Aspiring YouTuber
If you're dreaming of creating longer videos for YouTube—think tutorials, vlogs, or detailed product reviews—your needs are specific. You need precision, control, and solid audio tools to keep people watching for 10 minutes or more.
This is where a traditional desktop NLE (Non-Linear Editor) is king. Its multi-track timeline is a must-have for layering B-roll footage over your main video, a classic technique for keeping things visually interesting. Plus, you get advanced audio controls to clean up background noise, mix in music, and make sure your voice is crystal clear.
A desktop editor’s true power is in the details. The ability to make frame-by-frame cuts, dial in precise color correction, and mix multiple audio tracks is what separates a good YouTube video from a great one.
Yes, there's a learning curve, but the creative freedom you get is worth it. Most tutorials you'll find online feature big names like Adobe Premiere Pro or Apple's Final Cut Pro, so there’s a ton of support out there. It’s a different world from the Asia-Pacific market, where smartphone-first editing has exploded among beginners. You can find some interesting data on these regional trends over at snsinsider.com, which shows how geography really shapes software choices.
The Social Media Creator
For anyone focused on TikTok, Instagram Reels, and YouTube Shorts, it's all about speed. You need to jump on trends, use viral sounds, and get your content out fast.
Mobile editing apps are built for this. The entire workflow is designed to happen on your phone, right where the action is. You can shoot a clip, drop it into the app, and instantly find the trending audio, effects, and text animations that feel native to the platform.
Mobile apps are the clear winner here for a few reasons:
- Speed to Post: Go from filming to publishing in just a few minutes. It's essential for staying relevant.
- Trend Integration: These apps are always updated with the latest viral filters, sounds, and transitions.
- Direct Sharing: You can export and upload straight to your social profiles without ever needing a computer.
The beautiful simplicity of a mobile app is its biggest asset for this kind of content. For a deeper look, check out our guide to the best video editing software for social media: https://viewprinter.tech/blog/articles/best-video-editing-software-for-social-media.
The Small Business Owner
If you’re a small business owner or marketer, you have two priorities: efficiency and brand consistency. You need to churn out professional-looking ads, product demos, or testimonials without sinking days into a single video.
This is where browser-based platforms, like ViewPrinter, really shine. They are built from the ground up to make commercial video production as painless as possible.
Think about the typical marketing video workflow. You need your logo, brand colors, and fonts to look the same every single time. Browser-based editors often include a "brand kit" feature that saves all those assets, letting you apply them with one click. If you’re building an e-commerce brand, you'll need a tool that can help you create product videos that actually sell, and that’s what these platforms are designed for.
They're also great for teamwork. Your team can log in from any computer to review drafts, leave comments, and make quick fixes, which speeds up the whole feedback loop. By mixing ease of use with business-focused features, these tools give you the most direct path to creating high-quality, on-brand marketing videos.
A Simple Workflow For Your First Project
Theory is great, but diving in is where you really learn. No matter which video editor you settle on, the basic steps for putting a video together are pretty much the same. This workflow will walk you through your first project, breaking down the process so you can build confidence and a solid foundation.
Think of this as your creative roadmap. Following these steps keeps you organized and helps you avoid that classic "blank timeline" paralysis. The goal here isn't perfection—it's getting it done.
Step 1: Organize Your Media
Before you even dream of cutting a single clip, get your files in order. Seriously, this is a non-negotiable first step. Create a main project folder on your computer. Inside that, make subfolders for your raw video, audio (music, voiceovers), and any images or graphics you'll be using.
This one simple habit is an absolute game-changer. It saves you from that frantic search for a missing file hours later and makes importing everything a clean, simple process.
Once your folders are ready, open your editor and import all that media into your project bin or library. Now, everything you need is in one place, ready for action.
Step 2: Assemble Your Rough Cut
Next up is building the rough cut. This is where you lay out the basic skeleton of your story on the timeline. Don't stress about perfect timing or fancy transitions yet—just focus on getting the main pieces in the right order.
Start by dragging your main video clips onto the timeline. If you have an interview or a core narrative, put that down first to act as your foundation. Then, start adding your B-roll (the extra footage that adds visual flavor and context) on a separate track above your main clips.
A rough cut is like the sketch before the painting. Its only job is to establish the sequence and pacing of your story. Getting this right makes every subsequent step easier and more intuitive.
At this point, your video will probably look pretty choppy and disjointed. That's totally normal. The idea is to have all the core story elements in place before you start polishing.
Step 3: Refine With Precision Cuts
Now it’s time to turn that rough assembly into something smooth and watchable. This is where you’ll trim the fat from your clips, tighten up the pacing, and make your edits flow together.
Focus on trimming the start and end of each clip to get rid of any dead air or awkward moments. Most editors let you do this just by dragging the edges of the clip on your timeline.
This is also the perfect time to try two simple but incredibly powerful pro techniques:
- J-Cuts: The audio from the next clip starts playing a moment before you see the video. This pulls the viewer into the new scene by letting them hear what's coming.
- L-Cuts: The audio from the current clip keeps playing even after the video cuts to the next scene. This is fantastic for showing someone's reaction while they're still listening to the person who was just talking.
These cuts make your audio flow feel way more natural, which is often more critical for a professional vibe than the visuals. While many tools can simplify this, it’s a core skill worth learning. If you're looking to speed things up, an automated video editor can often handle initial trimming and pacing for you, giving you a great head start for your manual refinements.
Step 4: Enhance With Audio And Text
With your video sequence locked in, you can add the final layers of polish. Start by dropping a music track onto a separate audio layer. Tweak the volume so it supports the video without overpowering any dialogue or important sounds.
Next, add any text or titles you need. This might be an opening title, lower-thirds to introduce a speaker, or captions to make your video more accessible. Keep your text clean, readable, and consistent with the overall style of your project.
Finally, export your video. Most editors have presets like "1080p for Web" or "YouTube"—choose one of those. It ensures you get the right balance of quality and file size for sharing online. And that's it—congratulations, you’ve just finished your first video project
How Browser-Based Editors Simplify The Process
If you've ever felt intimidated by traditional video editing software, you're not alone. Most of it was built for professional editors, not for beginners. But a new wave of browser-based platforms is changing the game by tackling the most common hurdles new creators face: steep learning curves and the need for a high-powered computer.
These tools run completely in your web browser. That means no installations, no software updates, and no worrying if your laptop can handle the load. All the heavy lifting happens on their servers (in the cloud), which is a massive win if you’re working with a standard computer or on a tight budget.
Intelligent Features That Do The Hard Work For You
The real magic here is how these platforms use smart features to automate the tedious stuff. Think of all the time-consuming tasks you dread—they're often the first things to get automated.
For instance, manually transcribing and captioning a five-minute video could take you an hour. An AI-powered tool does it in seconds. Editing a long interview is as easy as editing a text document; just delete a sentence from the transcript, and the platform automatically cuts the corresponding video clip. It’s an incredible time-saver.
Browser-based editors level the playing field. They turn complex, time-consuming tasks into simple, one-click actions, allowing beginners to produce polished content that looks like it took a professional team to create.
It’s these kinds of intelligent features that make finding the best video editing software for beginners a much simpler task today.
Built For Speed And Teamwork
Another huge advantage is the built-in focus on getting content made quickly and efficiently. Instead of starting from scratch every time, you get access to tools designed for a fast, modern workflow.
- Template Libraries: Ditch the blank screen anxiety. You can start with professionally designed templates for social media ads, tutorials, or anything in between.
- Brand Kits: Keep everything looking consistent. Upload your brand’s logos, fonts, and colors once, then apply them to any project with a single click.
- Team Collaboration: Need a second opinion? Just share a project link. Your teammates or clients can jump in and leave comments or make edits directly, just like working in a Google Doc.
Platforms like ViewPrinter bundle all these capabilities together, offering a genuinely practical, all-in-one solution for anyone just starting their video creation journey.
Frequently Asked Questions
Jumping into video editing always brings up a few last-minute questions. It's totally normal. Getting these sorted out is often the last step before you feel confident enough to dive in and actually start creating.
Let’s tackle the big three I hear all the time: your computer's power, whether you should pay for software, and how long it really takes to get the hang of this.
Do I Need a Powerful Computer for Video Editing?
Not anymore. It used to be that editing video meant needing a beast of a machine, but that's just not the case for beginners today. While a powerhouse computer still helps for high-end software like Adobe Premiere Pro, modern tools have completely changed the game.
You have incredible options that don't demand expensive hardware.
Browser-based editors like ViewPrinter and mobile apps like CapCut were built from the ground up to run on just about any modern device. They pull this off by doing the heavy lifting in the cloud or being hyper-optimized for your phone. Starting with one of these is a smart move to learn the ropes without buying a new laptop.
Should I Choose Free or Paid Video Editing Software?
This one really boils down to your long-term goals. Free software can be shockingly good. For instance, the free version of DaVinci Resolve is powerful enough for Hollywood productions. But many free tools have catches, like putting a watermark on your final video or locking away essential features.
Paid software usually gets you better customer support, more frequent updates, and often comes bundled with huge libraries of stock music and video clips.
A great strategy is to start with a top-tier free tool or jump on a free trial for a paid one. This lets you get a feel for the workflow and see if it clicks with your style before you pull out your wallet.
This approach lets you test-drive different options without the risk, so you can find the best video editing software for beginners that genuinely works for you.
How Long Does It Take to Learn Video Editing?
Honestly, you can learn the basics way faster than you think. With a user-friendly tool, you can get the hang of cutting clips, adding text, and exporting your first video in just a few hours. Nailing those first few wins is huge for building momentum.
Mastering the craft—getting into nuanced color grading, sound design, and slick motion graphics—is a much longer journey. That never really ends. The key is to pick a tool that lets you grow. Just focus on learning one new skill with each video you make. You’ll be surprised how fast you go from feeling like a total novice to a capable editor.
Ready to skip the steep learning curve and start creating professional-quality content today? ViewPrinter provides an all-in-one platform with powerful AI tools, intuitive editing, and seamless scheduling to help you go from idea to viral video faster than ever. Create your first video for free on ViewPrinter!